Quick Answer:
You can record screen on Windows 10 or Windows 11 via:
Windows screen record shortcut: Windows + Alt + R (provided by Xbox Game Bar on Windows 10 & 11)
Windows screen recorder shortcut: Windows + Shift + S (provided by Snipping Tool on Windows 11)
Just like you can screen record Mac via Shorcut, you can also screen record Windows using shorcut provided by built-in Windows screen recorder apps. Here in this guide, I’ll not only show you how to perform screen recording via shortcut but also detail the pros and cons of using these Windows screen recorders. Read on to check the details.
Table of contents
Screen Record Shortcut: Windows + Alt + R
Tool: Xbox Game Bar
The Windows screen record shortcut – Windows + Alt + R is offered by the built-in screen recorder on Windows 10 and Windows 11 – Xbox Game Bar. Thus, if you are going to record screen on Windows 7 or Windows 8, using this shortcut won’t work.
Xbox Game Bar is a game-related tool that has been added with a screen recording feature since Windows 10. That’s why although you can access Xbox Game Bar on Windows 8, you can’t screen record Windows 8 with it. When you use Xbox Game Bar screen recording, it will help you capture a game or app with audio, including system sound, app sound, game sound, and microphone sound. Thus, if you are going to record gameplay, using this Windows screen recorder shortcut will satisfy you well.
However, it won’t help to record your desktop or File Explorer and can only record a window at a time. Therefore, it may not work to capture the screen you need.
If the Xbox screen recorder can fulfill your needs for screen recording Windows, go to Settings > Gaming > Captures to est your recording preferences and then follow the steps below:
Step 1. Press Windows + Alt + R to start recording immediately.
Step 2. Click the Stop icon or press Windows + Alt + R to end the screen recording.
Step 3. When you see the Game clip recorded message, click it to preview the recorded video.
Notes: You can also press Windows + G to launch Xbox Game Bar and start recording on Windows in the Capture panel.
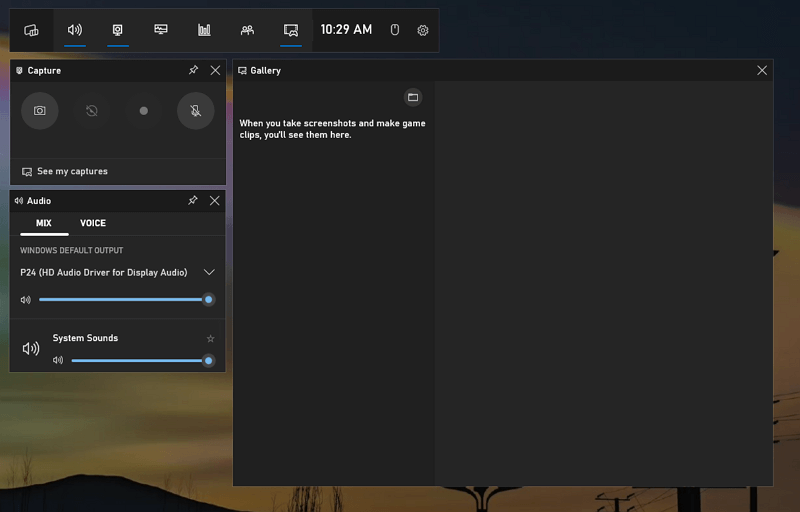
You can follow the same steps to screen record Windows 11 or record screen on Windows 10.
Windows Screen Record Shortcut: Windows + Shift + S
Tool: Snipping Tool
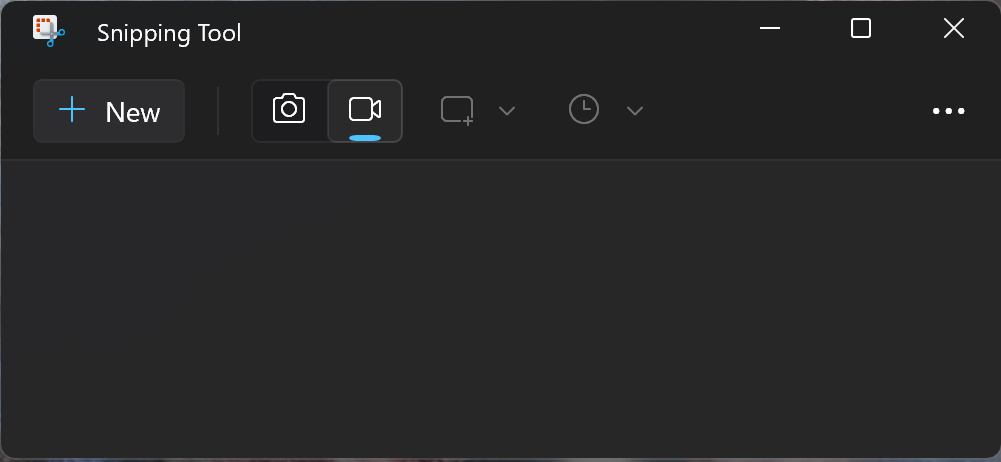
If you are using Windows 11, there is one more built-in Windows screen recorder for you – Snipping Tool. It has been updated with a screen recorder since Windows 11 and enables you to record the full screen or a select portion of the screen. However, Snipping Tool cannot capture your screen with audio, which makes it a less popular choice compared to Xbox Game Bar.
To use this Windows screen recorder:
Step 1. Press the shortcut, Windows + Shift + S, to launch Snipping Tool.
Step 2. When you see the Snipping Tool window, click the camera to switch to the Record mode.
Step 3. Click New and select the portion of the screen you’d like to capture.
Step 4. Click Start to start recording.
Step 5. When you’re done, click the Stop button and save the recording to your computer.
Customize Screen Record Shortcut
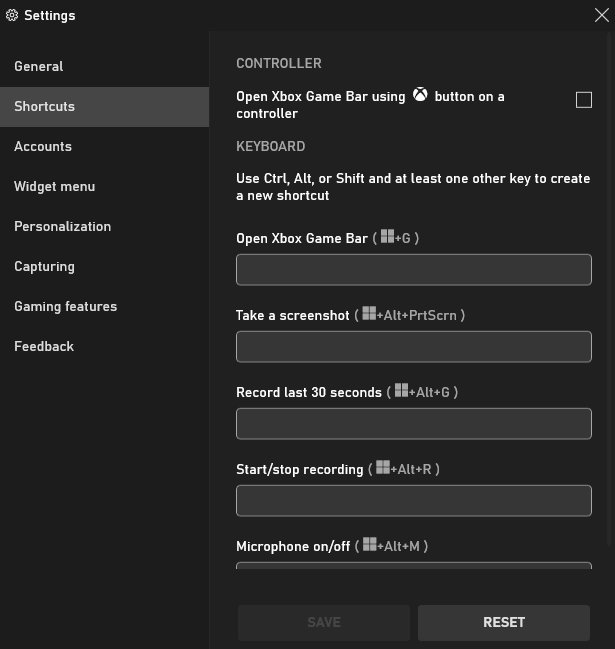
Xbox Game Bar provides access for you to customize the screen record shortcut using Ctrl, Alt, or Shift and at least one other key. With this feature, you will be able to create new shortcuts to start/stop recording, record the last 30 seconds, and more.
To customize screen record shortcut:
Step 1. Press Windows + G to launch Xbox Game Bar.
Step 2. Click the Settings icon and choose the Shortcuts tab.
Step 3. Set the new screen record shortcut and click Save.
Step 4. If you want to revert back to the default Windows settings, click Reset to reset your settings to the default.
Both Xbox Game Bar and Snipping Tool are not available in earlier Windows versions. If you need to screen record on Windows 8 or record screen on Windows 7, check the corresponding guide for workable ways.
Easy Windows Screen Recorder: SurFlex ScreenRecorder
Whether you use Xbox Game Bar or Snipping Tool, you can only save the recorded videos as MP4. Besides, both of them can’t cover most of the screen recording needs. Therefore, it’s advisable to use a professional Windows screen recorder like SurFlex Screen Recorder.
It performs well to capture the full screen, selected portion, game, app, webcam, and more, either with or without audio. Thus, you can record everything you need without missing a beat.
Moreover, it also enables you to screen record Windows via a shortcut, which you can set in Settings. Don’t hesitate to give it a try.
To screen record on Windows:
Step 1. Click Settings to choose the video format and quality, and then enable audio recording and select the audio type you’d like to capture.

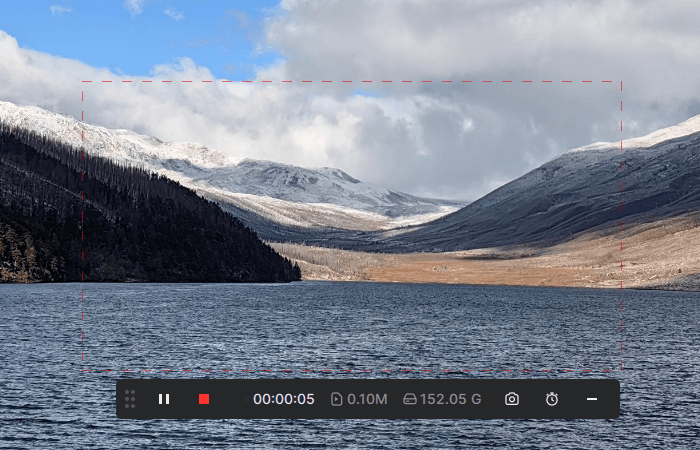
Step 2. Choose to record the full screen or a selected portion/window and then select the target area. Afterward, click REC to start recording the screen on Windows.
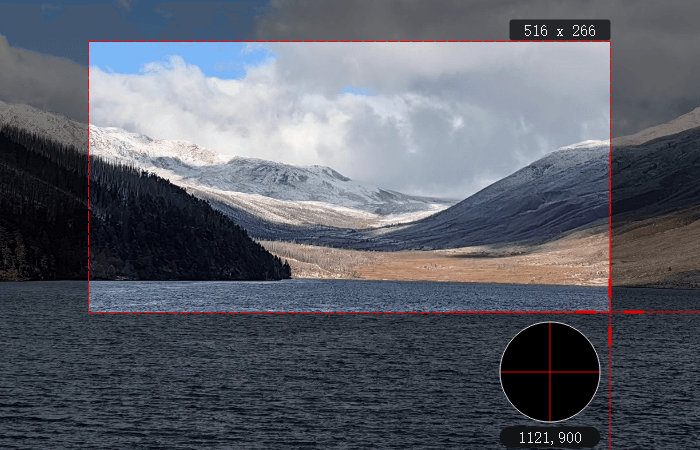
Step 3. Wait for the screen recording to finish, and then click Stop when necessary.
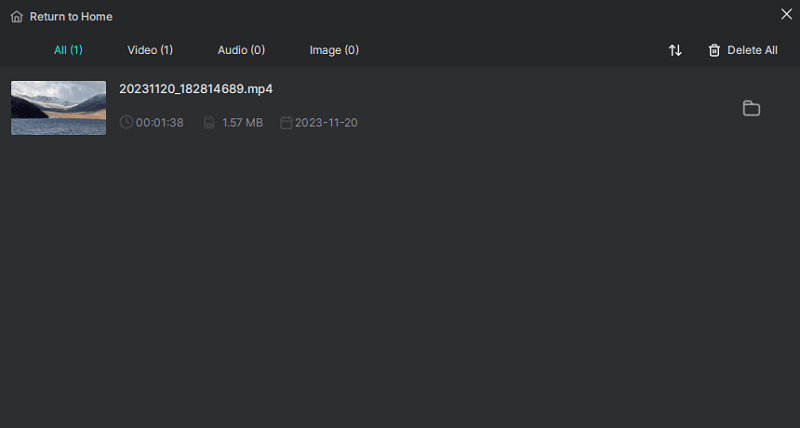
Step 4. Check the recorded video in the popup recording list window.
Screen Recording Shortcut: FAQs
When you use the Windows recording shortcut, you may also want to know:
The shortcut keys for screen recording on Windows 10 are Windows-Alt-R. You can press the same keys to end the recording.
Windows-Alt-R has the ability to record audio. However, that mainly depends on your recording settings. To record screen with audio using the shortcut. Go to Xbox Game Bar, choose Settings, click Capturing, and select the audio to record.
Windows 11 has built-in screen recorder apps, including Xbox Game Bar and Snipping Tool. The former can record games or apps with audio, while the latter can record the full screen or a selected region without sound.
Wrapping Up
Using a shortcut to record screen on Windows 10 or 11 is really simple and easy. However, it’s necessary to know these features in detail before you start to make sure you can capture whatever you want. If Xbox Game Bar or Snipping Tool can’t capture your desired content, using a third-party Windows screen recording tool such as SurFlex Screen Recorder, Movavi Screen Recorder, Snagit, OBS Studio, and Bandicam will be helpful.
About the Author
Related Articles
-
3 Tips to Screen Record Instagram Story Without Others Knowing
Check this guide and you will get the tips to successfully screen record Instagram story on your iPhone, Android, or computer.
Myra Xian Updated on -
How to Record Discord Calls on PC in 4 Ways
In this guide, you will know how to record Discord calls on PC in different ways, whether you are in a video or audio call.
Myra Xian Updated on -
3 Ways to Record Video at 60fps
Check the 60fps screen recorder toolsin this guide and use any of them to record video at 60fps on your computer succesfully.
Myra Xian Updated on

