Quick Answer:
The Windows 11 screen recorder tools below will help you screen record Windows 11 without strain:
1. Xbox Game Bar
2. Snipping Tool
3. SurFlex Screen Recorder
4. Bandicam
Screen recording is now a quite common activity as it’s a popular way to share our gameplay, make tutorials or demonstrations, and more. Thus, it’s important to know how to record screen on Windows, no matter which version of the operating system you use. Here, I’d like to show you how to screen record on Windows 11 using either free or paid Windows 11 screen recorder apps.
Table of contents
How to Record Screen on Windows 11 via Xbox Game Bar
Available in both Windows 10 and Windows 11, Xbox Game Bar is a quick and free way to record screen on Windows. As its name indicates, it is most suited to recording gameplay on your PC or laptop. Xbox Game Bar can’t capture the entire screen or a selected region. Instead, it will record the screen of apps you use (except for File Explorer and Windows desktop). If you want to record screen on Windows 11 with sound, including sound from the game, enabled mic, apps, and system, this built-in screen recorder for Windows can do you a favor.
Besides, the settings of the Xbox Game Bar are very flexible, allowing for a large degree of customization. Users have ample space for personalization.
Pros:
· Built-in app on Windows 11
· Free to use
· Good at capturing games and apps with various sounds
· Record one app only at a time
Cons:
· Can’t record the entire screen or a selected region
· Recordings are saved as MP4 files only
· A relatively complex interface
· Has a max recording length of 4 hours
Before you start, you can go to Settings > Gaming > Captures to set your recording preferences. Here you can set the Max recording length, whether to capture audio when recording a game, audio recording quality, and more. As for other recording-related settings, you can go to the Xbox Game Bar and click the Settings icon to customize the setups according to your preferences.
To screen record on Windows 11:
Step 1. Press Windows Key + Alt + R to start recording. Or you can press Windows Key + G to open the Xbox Game Bar and click the Start recording button in the Capture panel.
Step 2. To stop screen recording in Windows 11, press Windows + Alt + R or click the Stop recording button in the Capture panel.
Step 3. Then you will see a message saying Game clip recorded. Click the message and then it will direct you to the Gallery panel. Here you can see all the recordings.
Step 4. Click the Play button to view the video.
Notes: The recorded videos are saved in c:\users[username]\Videos\Captures by default. You can also go to the folder to check your Windows 11 recordings.
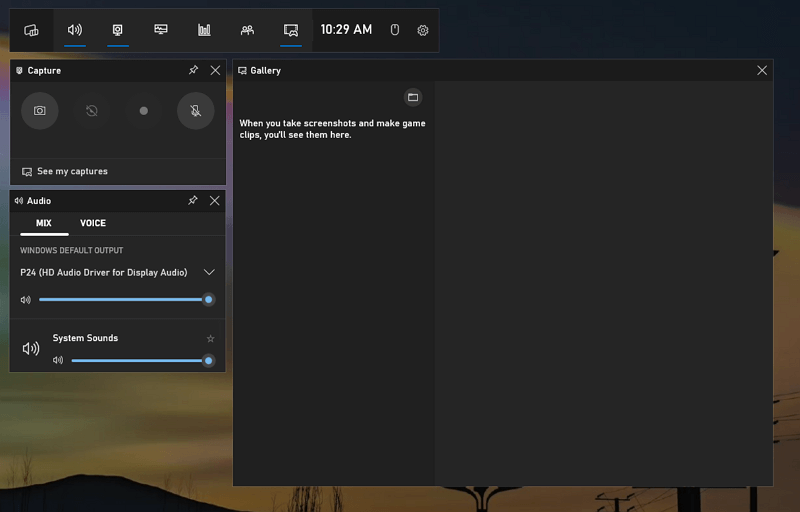
You cna follow the same steps to record screen on Windows 10.
How to Screen Record on Windows 11 via Snipping Tool (Without Audio)
Snipping Tool on Windows is primarily a built-in app for taking screenshots on Windows. But since Windows 11 build 22621.1344 or higher, it is also equipped with the ability to record screen on Windows. (You can record screen on Windows 10 using other ways in this guide.) Unlike Xbox Game Bar which will record the window of a game or app on your computer, Snipping Tool requires you to select the recorded region manually. That means you can record any screen on your PC.
Pros:
· Built-in app on Windows 11
· Free and easy to use
Cons:
· CAN’T RECORD AUDIO
· Save the recordings as MP4 only
To record screen on Windows 11:
Step 1. Open the Snipping Tool from the Start menu.
Step 2. Click the icon of the camera icon to switch to the Record mode.
Step 3. Click the New button. When the screen dims, use your mouse to select the region you’d like to capture. Then click Start.
Step 4. During the recording, you can click the Pause icon to take a break and then click the Record button to restart when necessary.
Step 5. To stop screen recording Windows 11, click the Stop icon.
Step 6. Now you will see the preview window, click Save As to save the screen recording as MP4 on your PC.
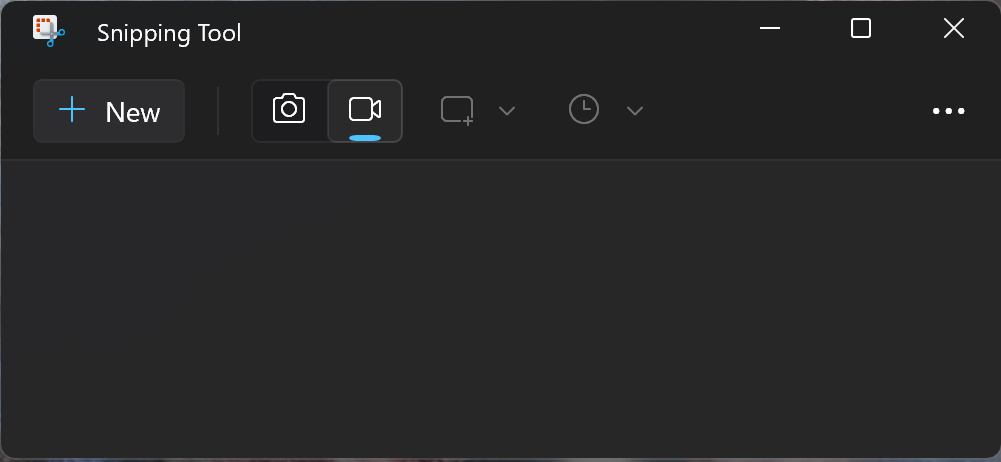
How to Record Your Screen on Windows 11 Without Game Bar
As you can see from the details above, although free to use, both Xbox Game Bar and Snipping Tool have limited functions that can’t fulfill screen recording needs on Windows 11 in various situations.
Then how to record screen on Windows 11 PC or laptop without Xbox Game Bar? The best alternative is using a third-party screen recorder for Windows 11 – SurFlex Screen Recorder. It provides an easy and straightforward Windows 11 screen recording solution for you and allows you to capture any screen or sound on your computer.
Pros:
· Multiple screen recording modes
· Support recording selected region
· Record webcam
· Record system sound, microphone, or both
· Support auto-stop
Cons:
· Paid software
To record screen on Windows 11 with sound:
Step 1. Launch SurFlex Screen Recorder on your PC and click Settings to set up the output options. Then select the audio recording options according to your needs.

Step 2. Select the recording area, such as your desktop, an app window, or any selected portion. Then click the REC button.

Step 3. When the screen recording is done, click the Stop icon in the menu bar.
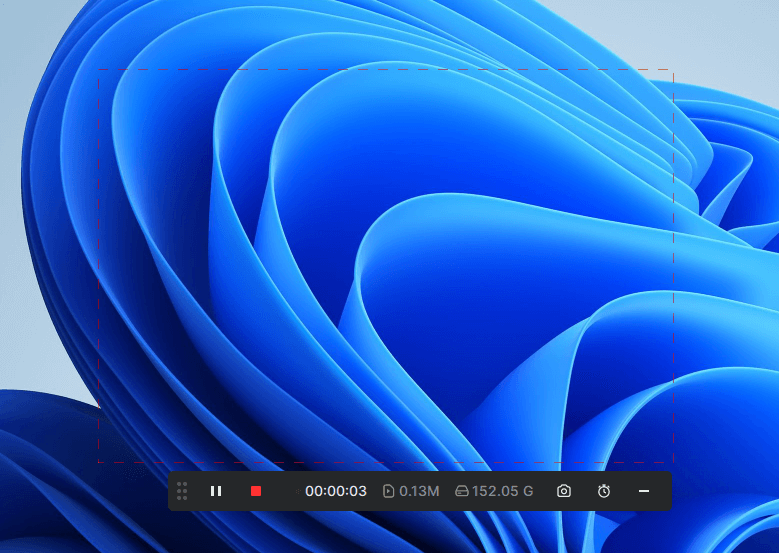
Step 4. Check the video in the popup window.
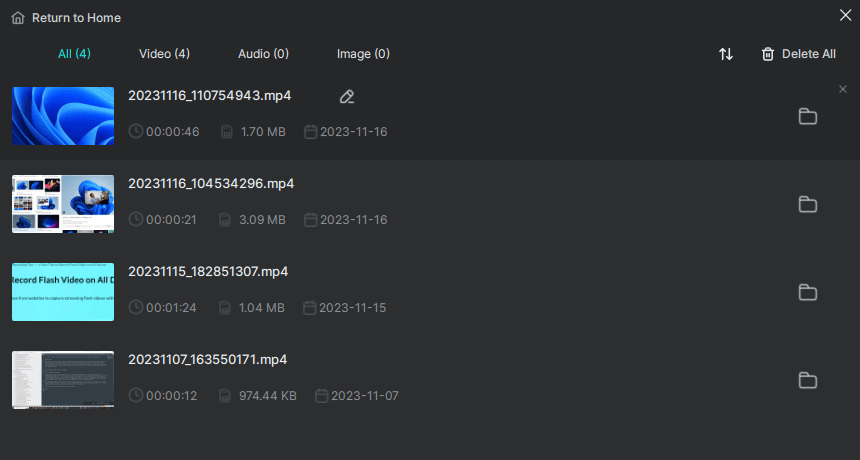
Due to its wide compatibility, you can also use this screen recorder to record screeen on Windows 7.
How to Record Screen on Windows 11 with Audio
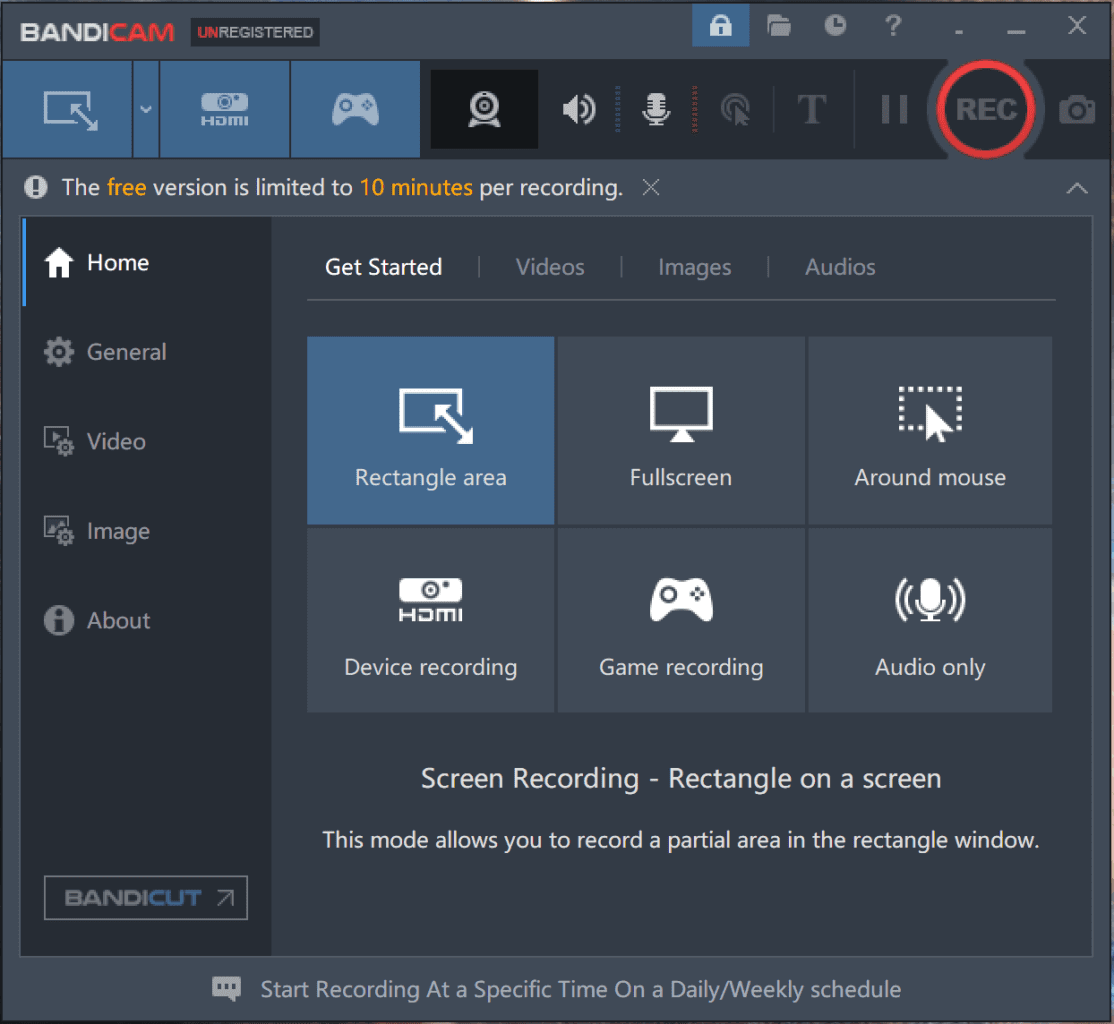
The final recommendation for recording your Windows 11 screen is to use Bandicam – a powerful screen recorder for Windows 11. It offers powerful and rich screen recording features that can meet your needs in various situations. If you want to know how to record your screen on Windows 11 with sound in a desired way, using Bandicam may be the best option for you.
Pros:
· Provide rich recording modes, including Around Mouse and Device Recording
· Enable real-time drawing
· Adds webcam overlay
· Has advanced setups
Cons:
· Paid software
· Less user-friendly interface
To record your screen on Windows 11:
Step 1. Launch Bandicam on your computer.
Step 2. Select a recording mode and click Start recording.
Step 3. Click Stop recording to stop screen recording Windows 11.
This app also helps to record screen on Windows 8 so that you an capture everything you want.
How to Screen Record on Windows: FAQs
When you record screen on your computer, you may also want to know:
Snipping Tool can record full screen on your Windows 11. However, it can’t catch audio. Thus, it’s advisable to record full screen on Windows 11 using a professional screen recorder for Windows, such as:
1. Bandicam
2. SurFlex Screen Recorder
3. Movavi Screen Recorder
4. Snagit
Xbox Game Bar will help you record screen with sound on Windows 11:
1. Open Xbox Game Bar and click Settings.
2. Click Capturing and choose All or Game under Audio to Record.
3. Click the Start Recording button in the Capture panel to start capturing the app or game.
The built-in app on Windows 11, Xbox Game Bar, and Snipping Tool, allow you to record screen on Windows 11 for free.
The Windows 11 screen recording shortcut: Windows + Alt + R.
Wrapping Up
Depending on your specific screen recording needs, the best screen recorder for you varies. To sum up:
If you want to record a game or app on your Windows 11 PC or laptop, using Xbox Game Bar is enough.
To record the entire screen or a selected portion without sound, using Snipping Tool is recommended.
While if you want to record screen on Windows 11 with audio to capture any video or audio, using a third-party Windows 11 screen recorder like SurFlex Screen Recorder or Bandicam is the optimal choice.
About the Author
Related Articles
-
How to Screen Record on Windows 11, 10, 8, 7: Ultimate Guide
There are 7 ways on how to screen record on Windows. Whether you use Windows 11 or Windows 7, you will know how to record screen on Windows.
Myra Xian Updated on -
4 Ways: How to Record Video on Windows 11
You will know how to record video on Windows 11 using different types of video recorders. Pick up the one you like to apply.
Myra Xian Updated on -
How to Screen Record on Acer Laptop in 4 Ways
You will know how to screen record on Acer laptop either with built-in screen recording feature or third-party Acer sceen recorder apps.
Myra Xian Updated on

