Quick Answer:
You can record screen on laptop using:
1. Snipping Tool
2. Xbox Game Bar
3. SurFlex Screen Recorder
4. Camtasia
5. ScreenCapture
Whether you want to know how to screen record on HP laptop or how to screen record on Dell laptop, after reading this guide, you will know all the workable ways to record a laptop screen, either with or without audio. With the help of various types of screen recorders for laptop, you will be able to capture all the videos and audio you desire.
Table of contents
How to Screen Record on Laptop in Windows 11
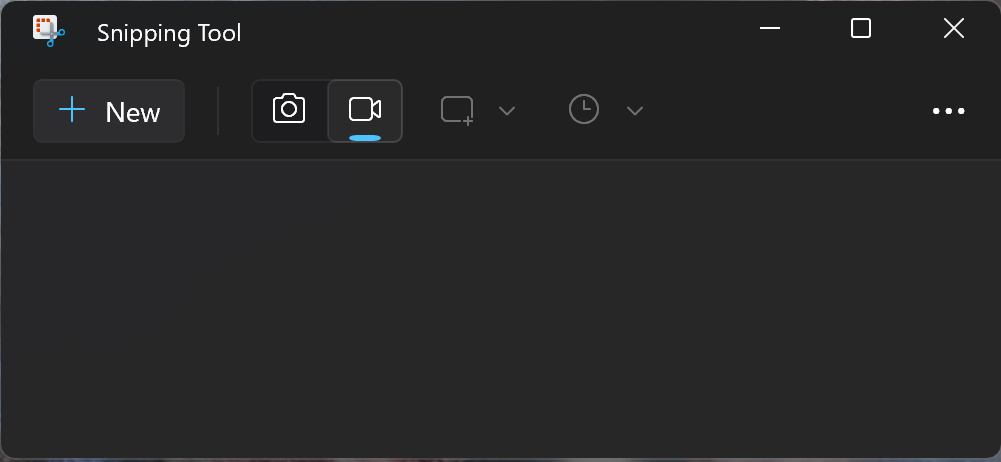
Snipping Tool has been upgraded with the screen recording features since Windows 11. Thus, if your laptop is running the latest Windows version, you can use Snipping Tool to record laptop screen for free. However, although the built-in Windows screen recorder enables you to record the entire screen or a selected portion, you can’t record screen on Windows with audio with it. Thus, if you want to record screen on Windows 11 with audio, Snipping Tool is not a suitable tool and you need to try the alternatives below.
To screen record on laptop in Windows 11:
Step 1. Press Windows + Shift + S to open Snipping Tool.
Step 2. Click the camera icon to enable the Record mode.
Step 3. Click New, select the area you’d like to capture, and then click Start.
Step 4. To end the recording, click the Stop icon.
Step 5. Preview the recording and save it to your Windows laptop.
How to Record Screen on Laptop in Windows 10
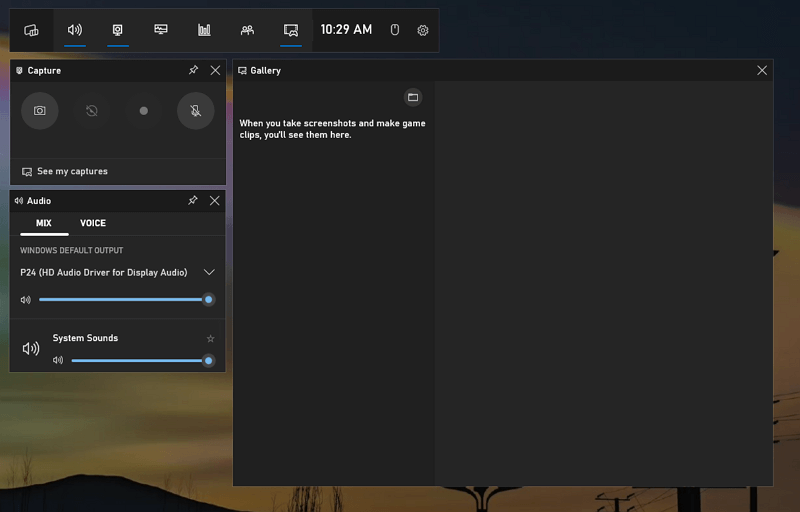
Windows 10 also has its native screen recorder – Xbox Game Bar. Compared with the Snipping Tool screen record, the Xbox Game Bar recording has more advanced features. It enables you to record screen on Windows 10 with audio and helps to record a game or app window.
However, Xbox Game Bar, although powerful enough to record gameplay, is not an all-inclusive screen recorder for your laptop. Why? It can’t record the laptop desktop or the File Explorer window and doesn’t support customizing the recording area. That’s why Xbox Game Bar is only recommended when you are looking to record a game or app on your laptop. If you want to record screen on Windows without Game Bar, check the guide for more tips.
By the way, Xbox Game Bar is also available on Windows 11, helping you to record screen on Windows 11 for free. Regardless of your laptop brand, you can use this app to screen record on Lenovo, Dell, HP, Asus, and more, as long as it is running Windows 10 or Windows 11.
To record screen on Laptop in Windows 10:
Step 1. Press Windows + Alt + R to start the screen recording on laptop immediately.
Step 2. Press Windows + Alt + R again or click the Stop button to end the recording.
Step 3. When you see the Game clip recorded message, click it to check the recording.
You can press Windows + G to open Xbox Game Bar and then start recording the laptop screen and view the recorded video there.
As for earlier Windows versions like Windows 7 and Windows 8, you can use Steps Recorder to record the screen on Windows for free. However, it’s not a recommended solution since it is quite limited. For more workable tips, check the guide on how to screen record on Windows 8 or how to screen record on Windows 7, depending on the OS your laptop uses.
How to Record a Laptop Screen Freely
As you can see from the information above, both Snipping Tool and Xbox Game Bar are limited to some degree. That’s why many of you need third-party screen recording software like SurFlex Screen Recorder to screen record on a laptop to get whatever you desire.
A professional screen recorder like SurFlex Screen Recorder can suit your needs in almost all screen recording situations, such as:
- Record screen on laptop with audio
- Record screen with webcam on Windows
- Record gameplay with microphone sound on computer
Whether you need to capture the entire screen or a selected area/window with or without webcam/audio, it will get you satisfied. Besides, it supports multiple video and audio output formats so that you can use your recordings on various devices, programs, or platforms.
To record a laptop screen:
Step 1. Open SurFlex Screen Recorder and go to Settings to select the output options. Afterward, set up the webcam and audio options according to your needs.

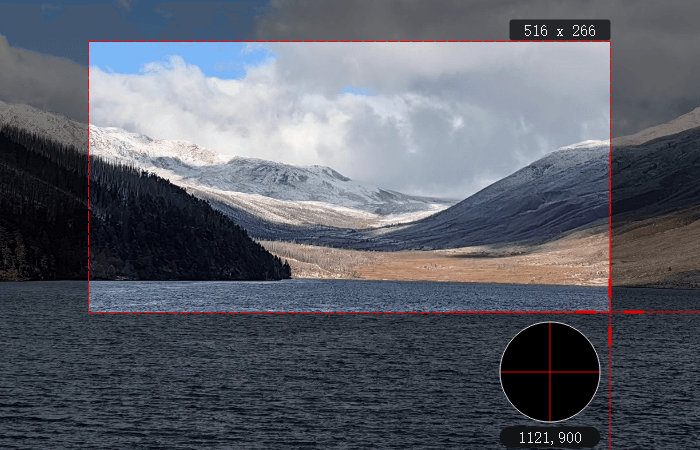
Step 2. Select the recording screen, region, or window, and then click REC to start the screen recording on your laptop.
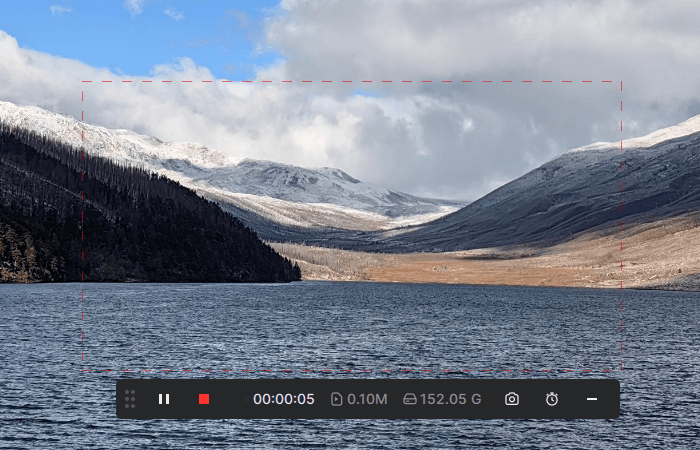
Step 3. Once the recording is done, click Stop in the recording bar.
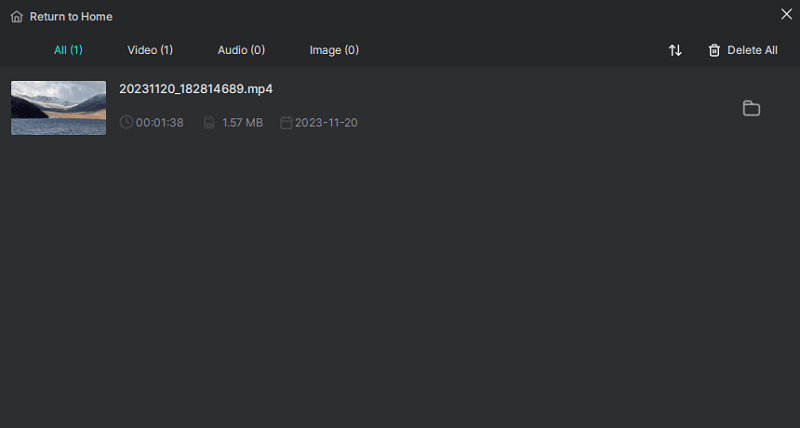
Step 4. Check the recorded video in the popup window.
How to Screen Record on a Laptop Flexibly
If you are an experienced video editor who wants more advanced features while screen recording on a laptop, using Camtasia is a better choice. Camtasia is both a screen recorder and video editor that provides rich screen recording and video editing features to create vivid videos.
Camtasia provides a free trial after you sign in with your account. However, when the free trial ends, you have to upgrade or enter a valid license key in order to continue using the app.
To screen record on a laptop:
Step 1. Download and install Camtasia on your Windows laptop.
Step 2. Sign in with your account.
Step 3. Click New Recording and it will bring you to the recording bar.
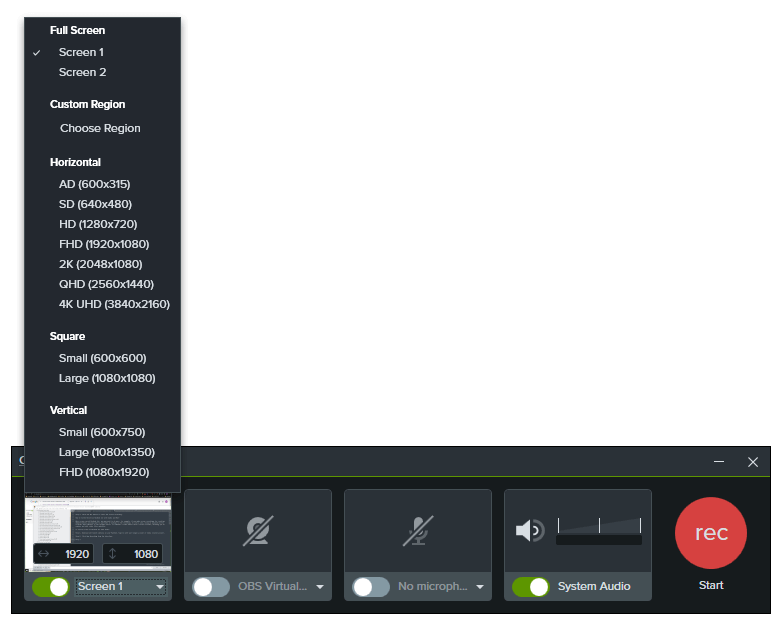
Step 4. Select the screen or window you’d like to record.
Step 5. Set up the webcam and audio input devices according to your needs.
Step 6. Click the REC button to start recording your laptop screen.
Step 7. Click the Stop icon in the control bar to end the recording when necessary.
Step 8. Edit and export the recording.
How to Screen Record on Laptop with Audio Online
Whether you are going to screen record on Asus or record screen on Acer, you can use an online screen recorder to capture everything you want on your laptop, no matter which Windows version your computer is running.
A web-based screen recorder like ScreenCapture allows you to record a laptop screen for free. You can also use it to record a screen with webcam and audio when you need to.
However, the free version will add a watermark to your recorded videos, and you can only save them in MP4 format at 720p. Although there are some functional limitations, if you don’t frequently need to record screens and don’t have specific requirements for video quality and format, I believe using online tools is the most convenient method.
To record screen on laptop online:
Step 1. Visit ScreenCapture.com.
Step 2. Set up the audio input options and webcam.
Step 3. Click Start Recording, choose to record a tab, window, or the desktop, and then click Share.
Step 4. When you are done, click Stop Sharing and then go back to ScreenCapture and click Stop Recording.
Step 5. Preview the recording and click Download to save the recorded video to your laptop.

Wrapping Up
Whether you are going to record screen on MSI laptop or screen record on a Samsung laptop, you can use one of the tools or services above to record your laptop screen easily. Except for Snipping Tool, all of the tools above enable you to record screen with audio on Windows. If you are a beginner, using the online screen recorder is the easiest way. While if you are an experienced user, using Camtasia may meet your needs best.
About the Author
Related Articles
-
4 Ways to Record Google Earth Easily
You will know how to record Google Earth on your device to capture a Google Earth touring for sharing or other purposes.
Myra Xian Updated on -
How to Record Discord Calls on PC in 4 Ways
In this guide, you will know how to record Discord calls on PC in different ways, whether you are in a video or audio call.
Myra Xian Updated on -
HD Screen Recorder: Record HD Video with Ease
With the HD screen recorder tools here, you will be able to easily record HD videos on your PC or Mac, either with or without app.
Myra Xian Updated on

