Quick Answer:
You can record videos on Mac using an external camera with the help of SurFlex Screen Recorder, OBS Studio, or QuickTime:
1. Select the webcam recording mode.
2. Select the webcam you want to use and set up the audio recording option.
3. Click REC.
Although your Mac has an integrated camera, you may prefer to use an external webcam when you record yourself on Mac. That’s because it helps to record videos in higher quality. If you do, follow this guide and you will know how to record video on Mac with external camera without any hassle.
Table of contents
How to Record Video on Mac with External Camera Easily
Tool: SurFlex Screen Recorder
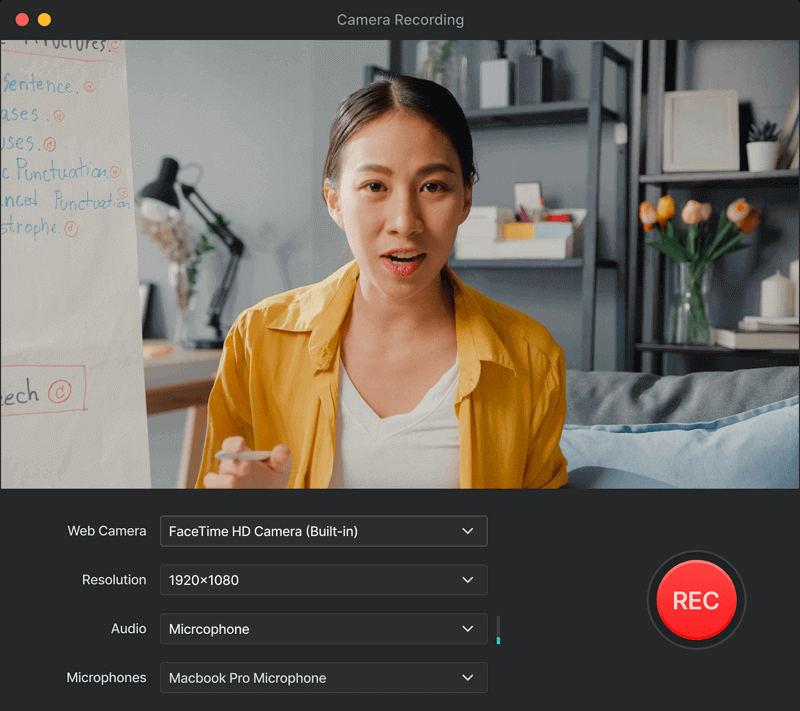
SurFlex Screen Recorder makes it easy to record video on Mac via a webcam. When you use this webcam recorder, you can select the camera you are going to use, the video resolution, the audio recording source, and the output format. With these customizable options, you can create a webcam recording that perfectly fulfills your needs.
What’s more, since SurFlex Screen Recorder also supports screen recording, you can record screen and webcam at the same time on your Mac to record yourself playing a game, presenting PowerPoint, and more.
Besides, it offers a 100% free online screen recorder (no watermark or time limit) which you can access via Chrome, Firefox, Safari, or Edge. This online service also helps to record webcam on your Mac and the recordings will be saved in HD quality. If you want an online webcam recorder, you can give it a try. Here I’d like to show you how to record a video on Mac via the external camera using the desktop tool.
To record a video on Mac with an external camera:
Step 1. Launch SurFlex Screen Recorder and go to Settings to select the output options. Then choose the Record Webcam mode from the left side.

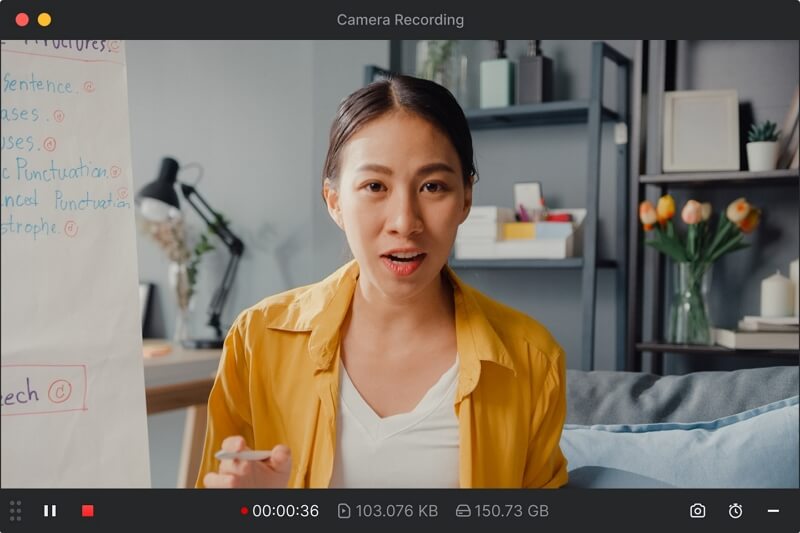
Step 2. Choose the camera recording settings, including the webcam you are going to use, the video resolution, the audio recording option, and the microphone. When you are ready, click REC to start recording yourself on Mac.

Step 3. Click the Stop icon when you are finished with the recording.

How to Record Video on Mac with Webcam for Free
Tool: OBS Studio
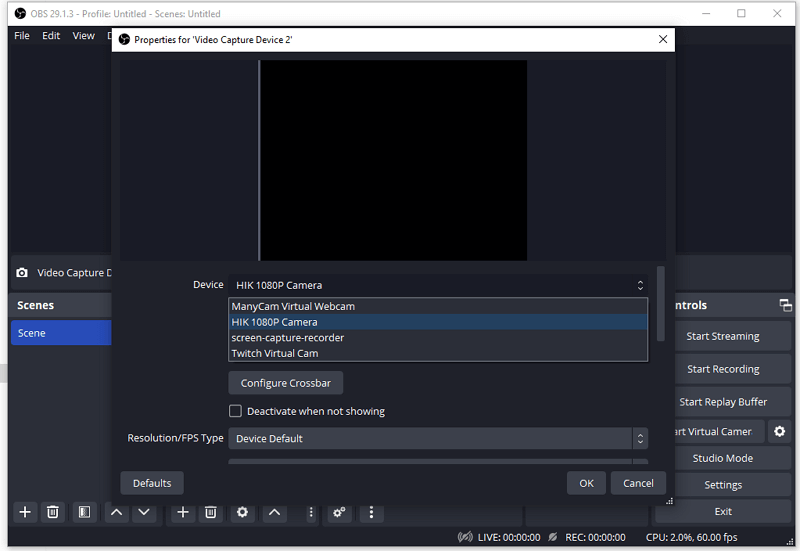
You can also screen record on Mac using OBS Studio. This freeware can easily capture your screen, an app window, or an external camera on your Mac. If you have multiple cameras available, you can choose the one you need and configure settings accordingly. It’s worth mentioning that OBS also helps to record video with blurred background, as long as you get the corresponding extension. If you prefer to record high-quality on Mac for free, OBS deserves a try.
To record video on Mac via webcam:
Step 1. Download and install OBS Studio on your Mac.
Step 2. Launch OBS Studio and go to File > Settings > Output to finish the output settings.
Step 3. Go to Sources, click the plus icon, and choose Video Capture Device > OK.
Step 4. Select the external camera you are going to use and click OK.
Step 4. Go to the Controls panel to start or stop the recording.

How to Record Webcam on Mac Directly
Tool: QuickTime Player
The preinstalled QuickTime Player on your Mac can also record video on Mac with an external webcam. It provides screen recording, webcam recording, and audio recording options. And via the camera recording option, you can record yourself on Mac using a selected camera.
Step 1. Open QuickTime Player on your Mac.
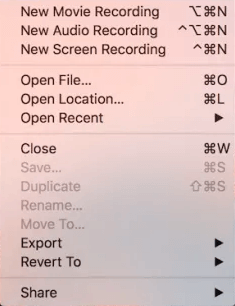
Step 2. In the menu, click on File, then select New Movie Recording.
Step 3. Click on the Options next to the Record button and choose your external camera, microphone, and video quality settings.
Step 4. Click on the Record button to start recording a video.
Step 5. To stop recording, click the Stop icon or use the Stop option on your MacBook’s Touch Bar.
Step 6. Go to File, then choose Export As or Save. Provide a name for the video recording, select a destination folder, and click Save to save the recording to your MacBook.

Wrapping Up
Whether you want to record webcam or capture other on-screen content on your Mac, you can use a video recorder introduced in this guide to get it done. If you only need to screen record with voice on Mac during the screen recording, using QuickTime Player is convenient. If you also need to capture audio coming from your Mac, it’s better to use a third-party app since Mac doesn’t natively support system audio recording.
About the Author
Related Articles
-
How to Record a Video on a Mac in 5 Ways
Whether you want to record yourself or your screen, you will know how to record video on Mac with five proven ways.
Myra Xian Updated on -
4 Ways to Record GIF on Mac
You will know how to record GIF on Mac using either desktop or online services. Apply the GIF recorder you prefer.
Myra Xian Updated on -
How to Record Screen on Mac with Audio from Video
You will know how to record screen on Mac with audio from video easily with either free or Paid method. Pick up the way you like to apply.
Myra Xian Updated on

