Quick Answer:
I’m going to show you how to record myself on Mac using the tools below:
1. Photo Booth
2. QuickTime Player
3. SurFlex Screen Recorder
Here I’d like to show you how to record myself on Mac using different ways. If you also need to record yourself on MacBook, you can check these tips for reference.
Table of contents
How to Record Myself on Mac via Photo Booth
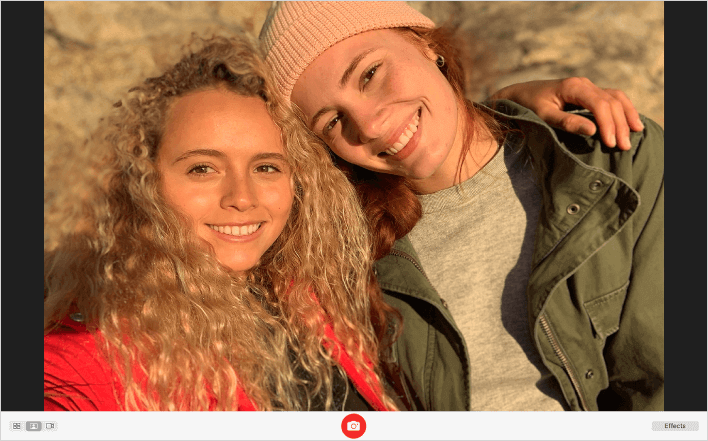
When I only want to record myself, excluding the Mac screen, I’d like to choose Photo Booth. The main features of Photo Booth are photo taking and video taking. Thus, I can use it to record a video of myself on Mac without installing any third-party software.
Besides, Photo Booth provides various effects that I can use during the recording, such as Black and White, Glow, Mirror, and more. When I need to make a funny video of myself, it’s my preferred pick.
Step 1. Open Photo Booth on my Mac.
Step 2. Click the video icon, click Effects to select an effect, and then click the Record button.
Step 3. Click the same button to stop recording.

In addition to Photo Booth, I’ll also use iMovie to record myself sometimes. iMovie has the advantage of providing video editing features. Therefore, when I need to edit the footage, I’ll use iMovie to record a video of myself on my Mac. You can also use these two apps to record yourself on a Mac easily.
How to Record Myself on My Screen on Mac
When I need to record myself and my screen on Mac at the same time, I’ll choose QuickTime Player instead. It allows me to record myself and my presentation simultaneously on Mac and thus is a good choice for me to make demonstrations and tutorials.
To record myself and my screen on Mac:
Step 1. Open QuickTime Player.
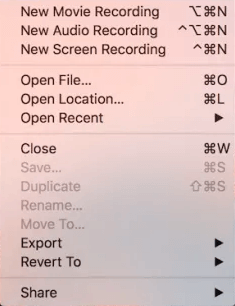
Step 2. Go to File > New Movie Recording, click View > Float on Top, and then adjust the size of the window.
Step 3. Go to File > New Screen Recording, select the region that includes the camera and the screen I’d like to capture, and click Record.
Step 4. Click the Recording icon to stop QuickTime screen recording.

That’s it. By doing so, I can record my screen and myself on my Mac at the same time without strain.
How to Record Myself on Mac Flexibly
Using Photo Booth and QuickTime Player can be helpful in most situations. But they are not always the best choice in some cases. For example, when I need to save the recording to other formats like MP4, WMV, and AVI, they won’t help. Thus, I also use a third-party Mac screen recorder like SurFlex Screen Recorder to screen record Mac sometimes.
A professional Mac screen recorder has more features and more advanced options, allowing me to capture my screen or myself in a more flexible way.
To record myself on Mac with SurFlex Screen Recorder:
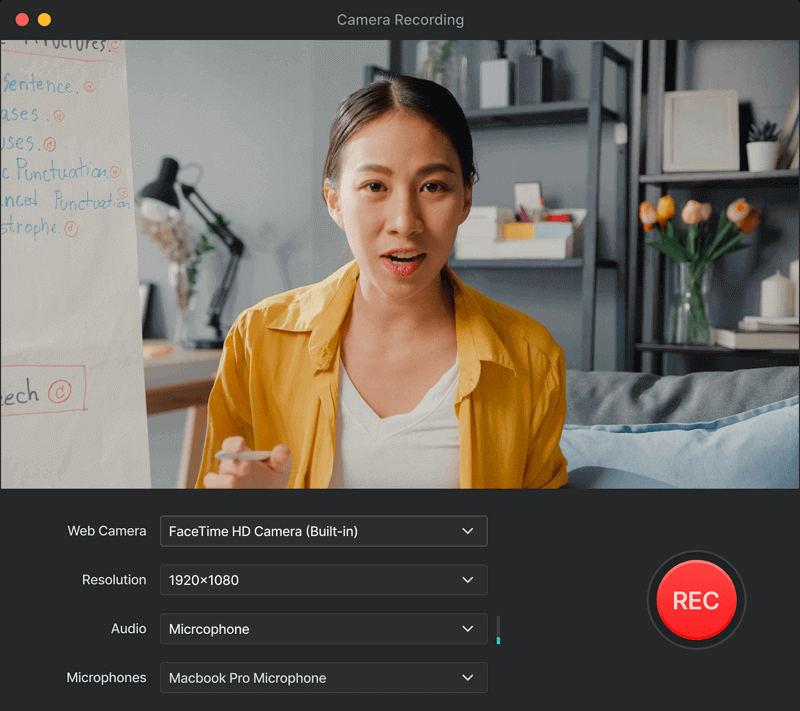
Step 1. Launch SurFlex Screen Recorder and go to Settings to select the output options. Then choose the Record Webcam mode from the left side.

Step 2. Choose the camera recording settings, including the webcam you are going to use, the video resolution, the audio recording option, and the microphone. When you are ready, click REC to start recording yourself on Mac.

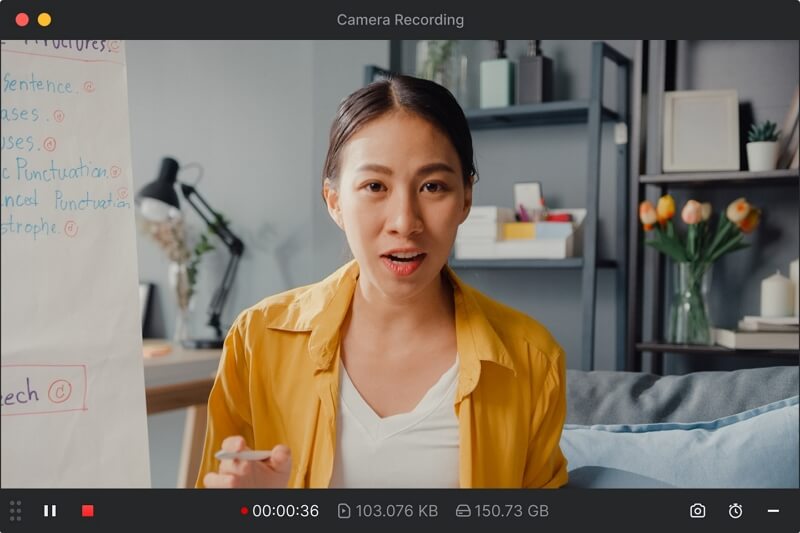
Step 3. Click the Stop icon when you are finished with the recording.

How to Record Yourself on Mac: FAQs
If you need to record yourself on a MacBook, the frequently asked questions and answers below may help solve your puzzle.
You can record yourself and your presentation on Mac using QuickTime Player following the steps below:
1. Launch QuickTime, click File, choose New Movie Recording, click View, and choose Float on Top.
2. Adjust the window to a proper size and appropriate position.
3. Click File, select New Screen Recording, choose the region that includes your presentation and the webcam, then click Record.
You can use QuickTime to record built-in audio on your Mac, but this requires additional advanced setups on your Mac. Thus, you are recommended to use a third-party screen recorder to record built-in audio on your Mac directly. For example, you can use Movavi, SurFlex Screen Recorder, Snagit, and Camtasia to record your system sound easily.
Yes, you can record yourself in iMovie on Mac. Although iMovie is primarily a video editing tool, it also provides screen recording features that allow you to record yourself on Mac.
Wrapping Up
Here is the real experience of recording myself on a Mac. To sum up, I generally use Photo Booth, iMovie, and QuickTime to record a video of myself on my Mac. However, if I need to do more than screen recording, I’d like to choose a third-party Mac screen recorder instead.
About the Author
You May Also Like
-
How to Screen Record on MacBook Air: 4 Proven Tips
If you are wondering how to screen record on MacBook Air M1 or M2, you can apply the tips here to capture Mac screen with sound easily.
Myra Xian Updated on -
Screen Record on MacBook Pro: 4 Ways You Can Try
You will know how to screen record on MacBook Pro with sound, either system sound, microphone sound, or both using proven ways.
Myra Xian Updated on -
How to Record Screen on Mac with Audio from Video
You will know how to record screen on Mac with audio from video easily with either free or Paid method. Pick up the way you like to apply.
Myra Xian Updated on


