

Updated on
Quick Answer:
You can record screen and webcam or camera simultaneously using ScreenApp, SurFlex Screen Recorder, and Camtasia. Depending on your specific needs, the best way for you varies.
Both Windows and macOS have built-in screen recorders. Some of them allow you to record a video of yourself, while others work to record your computer screen. But none of them allows you to record yourself and your screen directly.
Thus, when you want to record screen and camera at the same time, you will need a third-party screen recorder to help. Check the three easy tips below and use any of them to record screen and webcam on your computer, be it Mac or PC, effortlessly.
Table of contents
How to Record Screen and Camera At the Same Time Online
The easiest way to record screen and camera is to use an online screen recorder such as ScreenApp. It provides three screen recording modes: record screen, record screen and webcam, and record webcam only. Thus, when you need to record screen and camera at the same time, using this website will help you capture the video and audio you want. You can also use it to record full screen on Windows 10, 11, and more when needed.
ScreenApp is compatible with both macOS and Windows. Therefore, whether you are going to record yourself and your screen at the same time on Mac or PC, it will be helpful:
To record screen and camera at the same time.
Step 1. Prepare the integrated camera or the external camera.
Step 2. Go to ScreenApp.io, click Start Free, and sign in.
Step 3. Click New Recording.
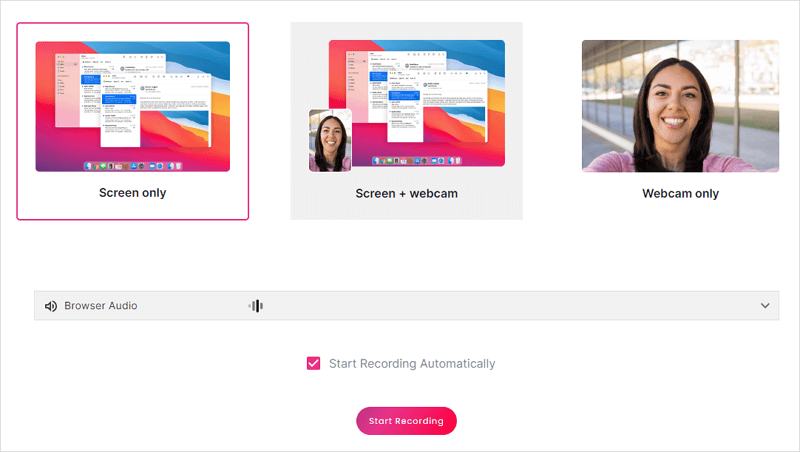
Step 4. Select Screen + webcam and allow access.
Step 5. Select the audio to be recorded.
Step 6. Check Start Recording Automatically and click Start Recording.
Step 7. Select the screen you’d like to capture and click Share.
Step 8. When you’re done, click Stop Sharing.
Step 9. Go back to ScreenApp, preview the recorded video, and then click Download to save the video to your computer.
Record Screen and Webcam or Camera with SurFlex Screen Recorder
Undoubtedly, online services are really convenient to use. However, they generally have limited functionality compared with desktop-based screen recorder apps. When you want more advanced options while recording screen or more customizable features, using a professional screen recorder like SurFlex Screen Recorder is a good choice.
It not only helps to record screen and camera at the same time but also allows you to record the full screen, part of the screen, a window, or webcam only. If you need to record screen on Windows or Mac often, using SurFlex Screen Recorder will be quite effective.
Besides, it provides different video and audio output formats for you to choose from. Whether you want to record a video on PC in MP4 or AVI, it will get it done easily.
To record screen and webcam:
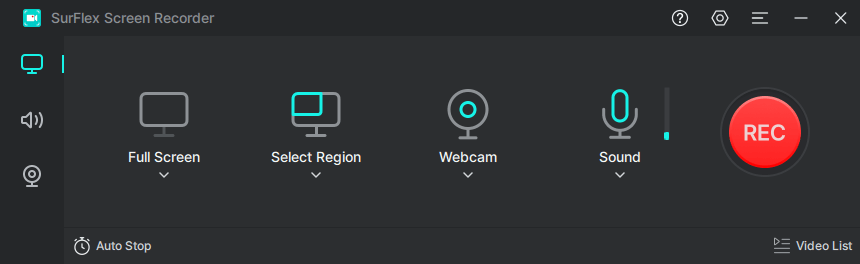
Step 1. Open the screen recorder on your computer and click Settings to set up the output options.
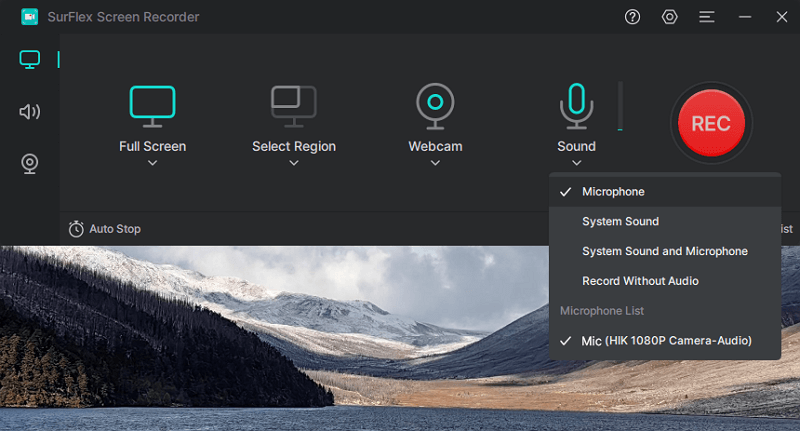
Step 2. To record yourself and your screen on Windows with audio, enable audio recording and select the audio type you need.
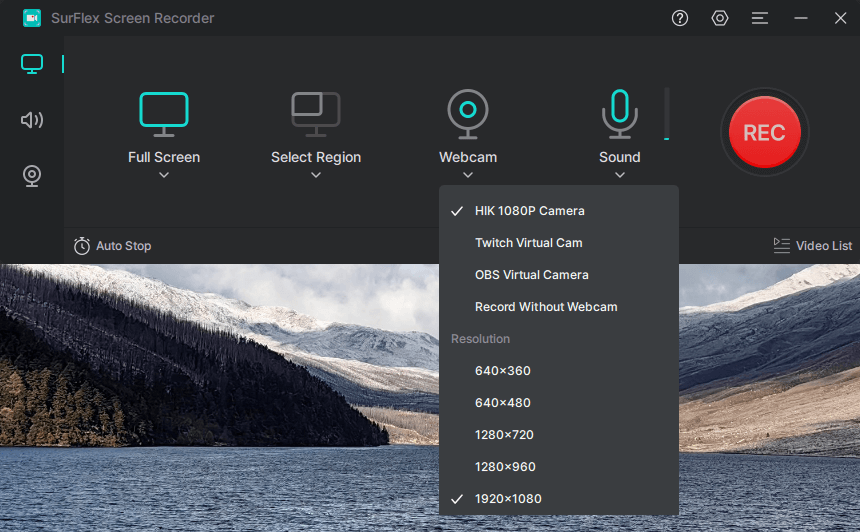
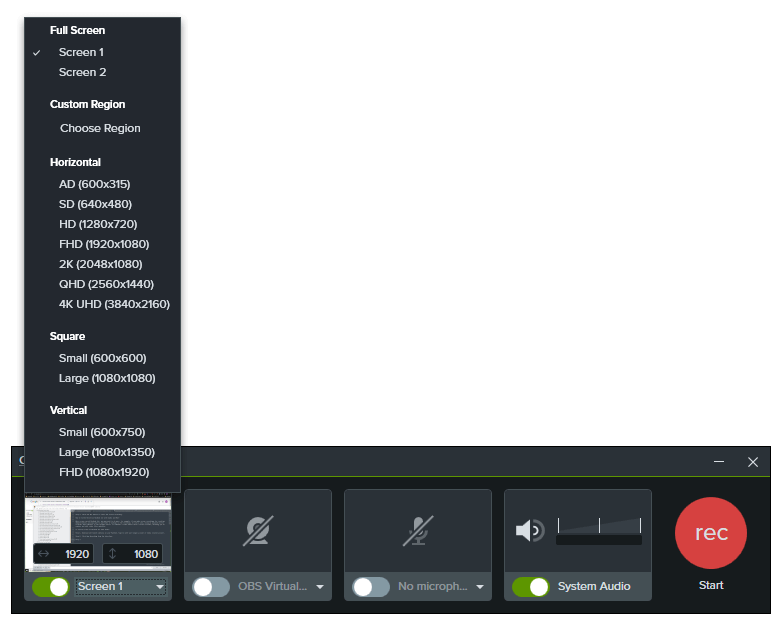
Step 3. Enable Webcam recording, select the webcam you’d like to use, and then choose a resolution you like.
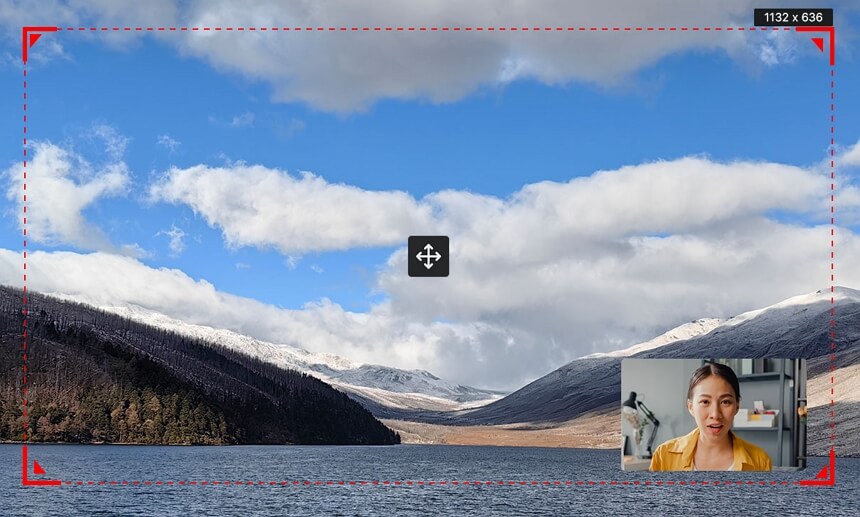
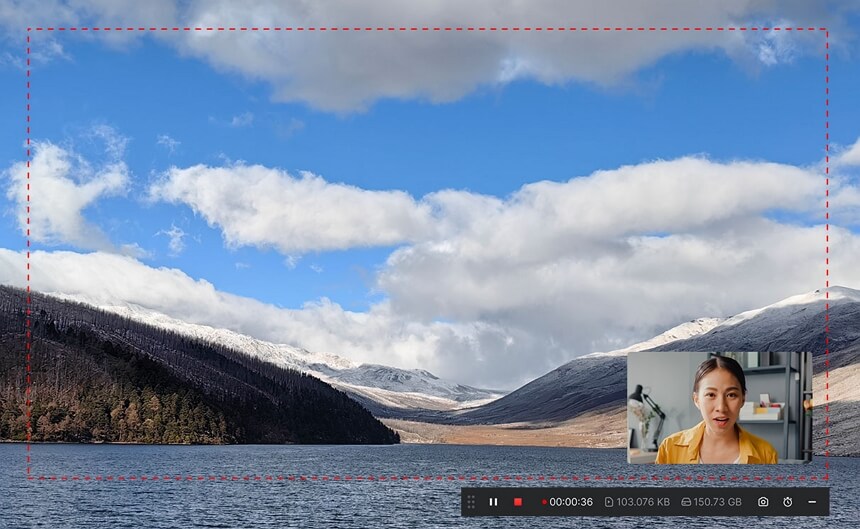
Step 4. Select the screen, portion, or window you’d like to capture and adjust the size and position of the webcam. When you are ready, click REC to start recording yourself and the screen.
Step 5. After you capture the desired content, click Stop to end the recording and check the video in the popup window.
How to Record Yourself and Your Screen with Camtasia
A more advanced screen recorder that not only works to capture video and audio in various situations but also helps to edit recordings with advanced features is Camtasia. If you are an experienced video editor who wants a more professional screen recorder and video editor, Camtasia is the optimal choice.
Camtasia provides both Windows and Mac versions, allowing you to record screen on Mac or PC flexibly.
To record yourself and your screen:
Step 1. Open Camtasia and sign in.
Step 2. Choose New recording.
Step 3. Select a recording mode and set up the webcam.
Step 4. Set up the audio input options.
Step 5. Click REC to start recording yourself and your screen.
Bonus Tip: Screen Record with Camera
If you only want to record yourself on your laptop or desktop, using the built-in app on your Windows or Mac will get it done directly. Here I’d like to show you how to record yourself on Windows. If you are looking to record yourself on Mac , check the related guide for detailed steps.
To screen record with camera:
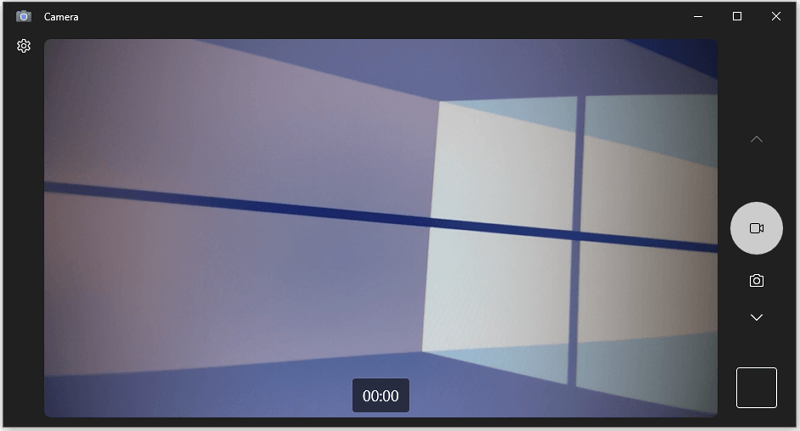
Step 1. Open the Camera app from the Start menu.
Step 2. Click Settings to set up the Camere settings and Video settings.
Step 3. Switch to the video-taking mode.
Step 4. Tap Start taking video to screen record with the camera immediately.
Step 5. Click the stop icon to end the recording.
Wrapping Up
It’s easy to record screen and webcam with a third-party screen recorder. Whether you are going to record a screen and camera at the same time on a Mac or PC, there are lots of tools or services to help. In addition to the ones mentioned above, there are other worth-trying choices:
- Snagit
- Bandicam for Windows
- Zappy
- Fraps
- Loom Screen Recorder & Screen Capture
- Awesome Screenshot & Screen Recorder
About the Author
You May Also Like
-
How to Record Video on PC with External Camera on Windows 10 & 11
You will know how to record video on PC with external camera. Whether you use Windows 10 or Windows 11, you can find the right way to apply.
Myra Xian Updated on -
2 Ways to Record Video with Blurred Background
Check this guide and you will know how to record video with blurred background on your PC or Mac without difficulty.
Myra Xian Updated on -
How to Record Webcam with VLC: Simple Guide
Check this detailed guide to learn how to record webcam with VLC on your PC or Mac. Then you can record webcam videos freely.
Myra Xian Updated on