Quick Answer:
You can screen record with mic on your computer or mobile using SurFlex Screen Recorder for Windows & Mac, QuickTime Player, SurFlex Online Free Screen Recorder (no watermark, no time limit), or the built-in video recorder on your mobile device.
When you want to record yourself talking, such as when presenting a PowerPoint, you’ll need to screen record with microphone to capture both your computer screen and your voice. If that’s what you’re looking to do, check out this guide to learn how to screen record with voice. Whether you’re using a computer or a mobile device, you’ll find the corresponding solution in the guide.
Table of contents
How to Screen Record with Voice on PC
Tool: SurFlex Screen Recorder
Whenever you need to screen record on Windows with audio, be it microphone audio, system sound, or both, you can use SurFlex Screen Recorder. This screen recorder works to record any part of your screen with audio. Whether you are going to record a game clip, capture a meeting, or archive your presentation, it will serve you well. When you record screen and microphone, you can also choose to save a separate audio file. What’s more, you can customize the output settings to record videos on PC in your preferred format and quality.
To screen record with microphone on Windows:
Step 1. Open the screen recorder on your computer and click Settings to set up the output options.

Step 2. To record the screen on Windows with audio, enable audio recording and select the audio type you need.
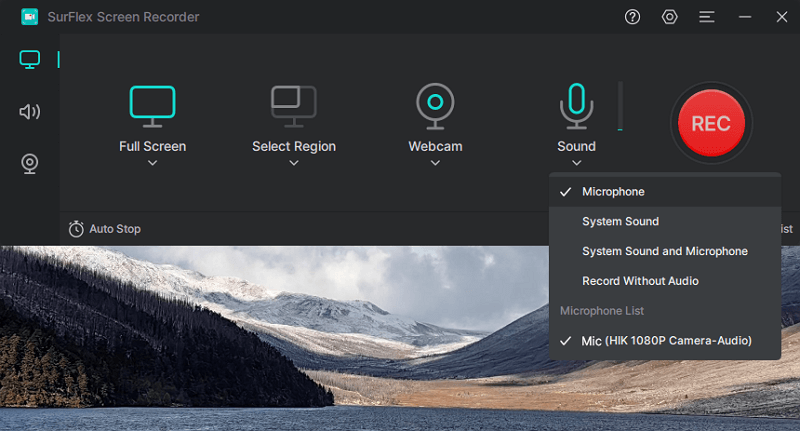
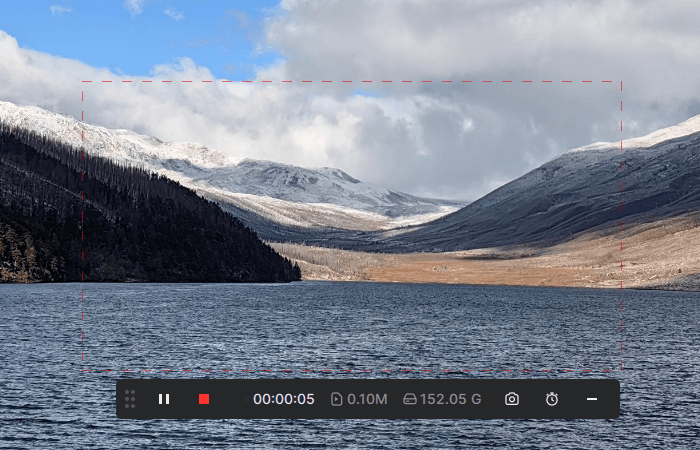
Step 3. Select the recording region, such as your desktop, an app window, or any selected portion, and then click REC to start recording a video on Windows.

Step 4. After you capture the desired content, click Stop to end the recording.
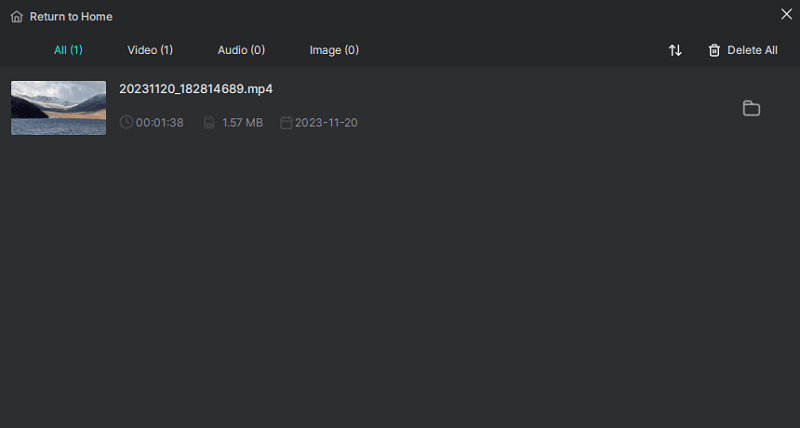
Step 5. Check the recorded video in the popup window.
How to Screen Record with Microphone on Mac
Tool: QuickTime Player
If you are going to screen record with voice on Mac, in addition to using the SurFlex Screen Recorder mentioned above, you can apply the native screen recorder on Mac to help, which is QuickTime Player. With its screen recording feature, you can easily screen record with the microphone on your Mac for free. However, when it comes to recording the screen with internal audio, it can’t do it by default and you will need a third-party virtual audio driver, such as BlackHole, to get it done.
To screen record with a microphone on Mac:
Step 1. Open QuickTime Player and click File > New Screen Recording.
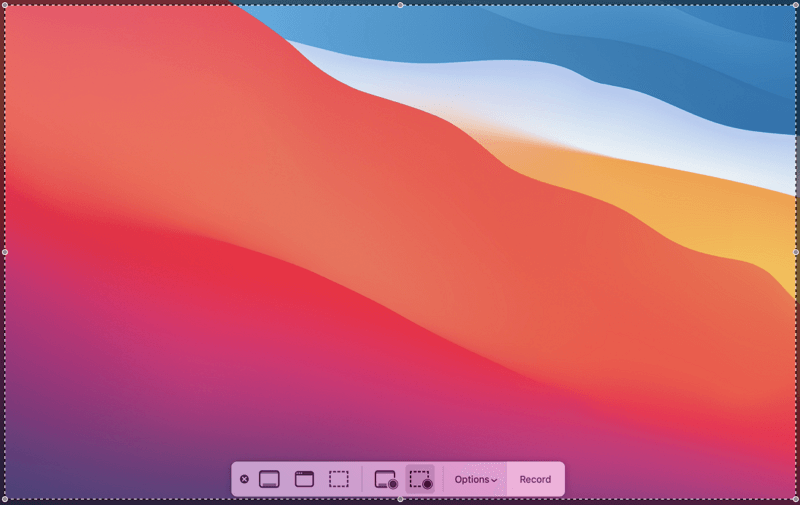
Step 2. Go to the Controls bar and click Options.
Step 3. Select the microphone you’d like to use and set up other recording options.
Step 4. Choose to record the entire screen or a selected portion.
Step 5. Click Record to start recording the screen on your Mac with microphone sound.
Step 6. Once finished, click Command + Control + Escape to end the recording.
Step 7. Name the recording and save it to your Mac.
How to Screen Record with Mic on Mac or PC for Free
Tool: SurFlex Online Free Screen Recorder
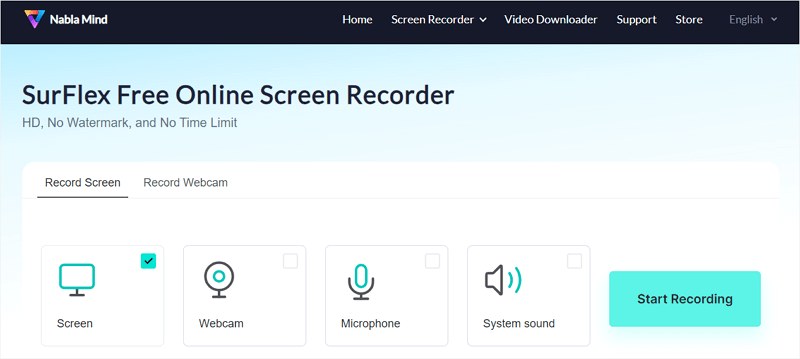
Whether you are using a Mac or PC, you can use SurFlex Online Free Screen Recorder to capture the screen and microphone on your computer. It allows you to record a browser tab, an app window, or the entire screen with system sound, microphone, or both. You can also enable webcam recording if you need to. Therefore, it is also a practical method for recording videos with the microphone.
It’s worth mentioning that this online screen recorder is completely free to use and does not impose any limitations, such as adding a watermark or restricting the recording time. If you’re seeking a free screen recorder with microphone support, don’t hesitate to give it a try.
To record screen with microphone online for free:
Step 1. Visit SurFlex free online screen recorder using Chrome, Firefox, Safari, or Edge.
Step 2. Check the recording sources you need, such as Screen and Microphone. Then click Start Recording.
Step 3. Select the target screen and click Share to start recording.
Step 4. When you are done, click Stop Sharing or go back to the screen recorder to click Stop Recording.
Step 5. Check the video and click Download to save it to your computer.
How to Screen Record on iPhone with Voice
Tool: Built-in screen recorder on iOS
To screen record with the microphone on an iPhone, you don’t need any third-party app since the native screen recorder on iOS can do it for you. Whether you are using an iPhone or iPad, you can follow the steps below to capture both your device screen and microphone sound.
To screen record with the microphone on iPhone:
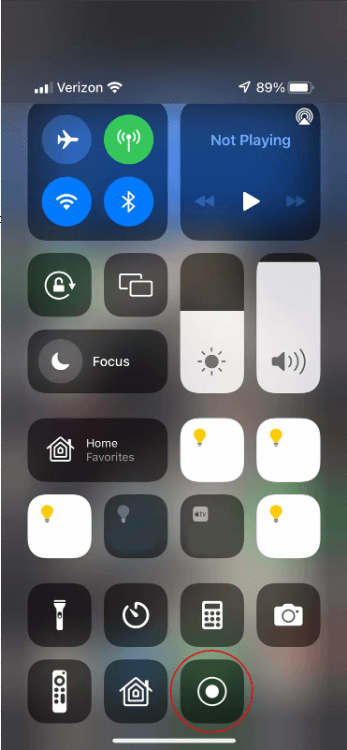
Step 1. Add Screen Recording to your Control Center via Settings.
Step 2. Swipe down to open Control Center on your iPhone.
Step 3. Press and hold the recorder icon and turn on the Microphone recording.
Step 4. Prepare your screen for recording.
Step 5. Open Control Center and tap the Record icon to record your iPhone screen and microphone.
Step 6. When needed, tap the recording bar and click Stop.
How to Screen Record with Voice on Android
Tool: Built-in screen recorder on Android
There is also a built-in screen recorder with microphone support available on Android phones, allowing you to screen record with voice on Android easily without any cost.
To screen record with voice on Android:
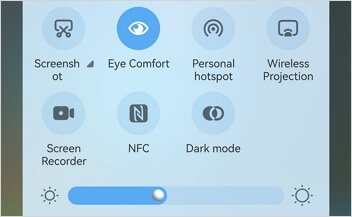
Step 1. Make sure Screen Recorder is added to your control panel.
Step 2. When you are ready to record, open the control panel and tap the Record option.
Step 3. To record with a microphone, tap the recording bar and enable mic recording.
Step 4. To end the recording, tap the recording bar and hit Stop.
Step 5. Go to the Gallery app to check the recorded video.
Wrapping Up
Whether you are going to record your screen with the microphone voice or audio coming from your computer, you can use the tips in this guide to get it done. However, if you are using a Mac, it’s necessary to get an extra audio driver so that your Mac can capture system sound. If you don’t want to do it manually, using a third-party screen recorder will be much easier.
About the Author
Related Articles
-
How to Screen Record on Acer Laptop in 4 Ways
You will know how to screen record on Acer laptop either with built-in screen recording feature or third-party Acer sceen recorder apps.
Myra Xian Updated on -
4 Ways: How to Screen Record on Chromebook with Audio
You will know how to screen record on Chromebook with built-in screen recorder apps or screen recording extensions for Chrome.
Myra Xian Updated on -
How to Record Gameplay and Discord Audio in 3 Ways
After reading this guide, you will know how to record gameplay and Discord audio on your computer in three ways.
Myra Xian Updated on

