Quick Answer:
You can record online classes using SurFlex Online Free Screen Recorder, SurFlex Screen Recorder, or ShareX. Just set up the output settings, select the recording region, and click Record to capture any content you need.
When you are taking online courses, you may find it beneficial to record the classes for later review. Therefore, it’s necessary for you to learn how to record online classes. In light of this, I would like to demonstrate three proven methods for recording an online course. By utilizing any of them, you will be able to capture the content you desire.
Table of contents
How to Record Online Classes Without Any Software
Tool: SurFlex Online Free Screen Recorder
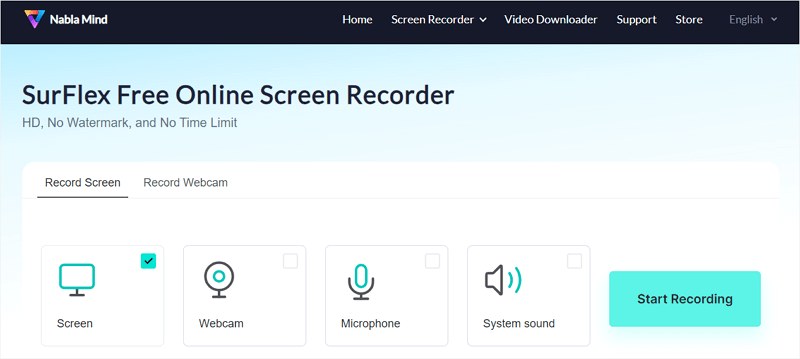
With the help of SurFlex Online Free Screen Recorder, you will be able to record a browser tab, an app window, or the entire screen on your computer. During the screen recording, you can choose to capture system sound, microphone, or both. Thus, when you need to record online classes on your computer, you can let it help.
SurFlex Online Free Screen Recorder is 100% free to use and won’t add any watermark or time limit to your recording. What’s more, it will save your recordings in HD quality, ensuring a good viewing experience. As long as you have Chrome, Firefox, Safari, or Edge on your computer, you can use this website to record an online course on your computer.
Note: Due to the browser’s limits, you can’t record audio if you choose to record an app window. Therefore, it’s advisable to record a browser tab or the entire screen so that you can record classes with audio.
To record an online class for free:
Step 1. Open a browser and navigate to SurFlex Online Free Screen Recorder.
Step 2. Select Screen and System Sound and click Start Recording.
Step 3. Choose to record a browser tab or the entire screen and then click Share to start recording the class.
Step 4. When you are finished with the recording, click Stop Sharing.
Step 5. Go back to the online screen recorder, preview the video, and click Download to save the recording to your computer.
How to Record an Online Class with More Flexibility
Tool: SurFlex Screen Recorder
Using an online screen recorder is convenient indeed. It doesn’t provide as many features and customizable options as a desktop app. If you have high requirements for the recording, using a desktop tool like SurFlex Screen Recorder will be more suitable. It allows you to record video at 60fps in its original quality and save the video in your preferred format. If you prefer a more flexible solution, follow the steps below to have a try.
To record an online class:
Step 1. In SurFlex Screen Recorder, go to Settings to choose the video format and quality you need.

Step 2. To record an online video with audio, choose System Sound among the audio recording options.
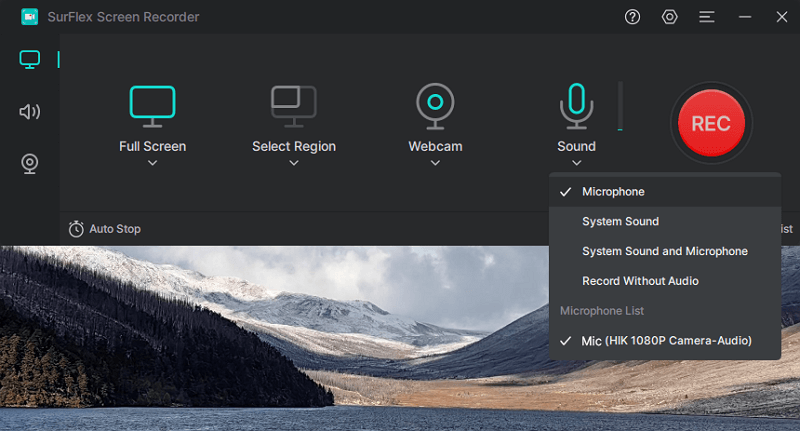
Step 3. Choose Full Screen or Select Region according to the video you’d like to capture.
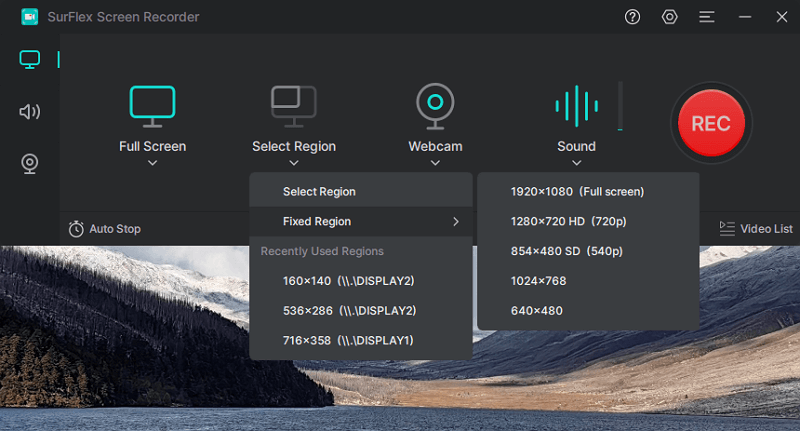
Step 4. Select the recording area and click REC to start recording the online video.

Step 5. When needed, click Stop and then check the recording in the Video List.

Tool: Vmaker Screen Recorder
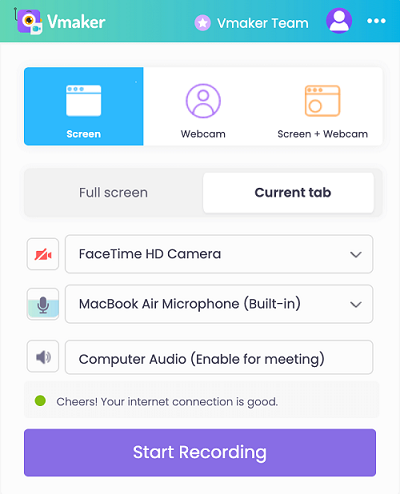
Vmaker is a free screen recorder that enables users to capture screens, webcams, or both with audio. Using Vmaker’s AI video editor and AI subtitle generation, you can transform your recordings within minutes by intelligently adding b-rolls, background music, transitions, effects, subtitles, and more, making your recordings publish-ready with just one click.
Vmaker can be the perfect solution for effortlessly recording online classes at HD quality. You can utilize Vmaker’s Chrome extension or Desktop app for Mac and Windows.
Here are the steps to record Online classes using Vmaker Screen Recorder.
Step 1. Download the Vmaker screen recording software or use Chrome Extension.
Step 2. Install the Vmaker app & enable the permissions.
Step 3. Select the mode of recording – Screen, Webcam, or both.
Step 4. Choose the area for recording. Record full screen, only a window or custom size.
Step 5. Enable the mic and choose the audio source.
Step 6. Start recording!
Step 7. Use features like screen annotation, AI-powered virtual background, and mouse emphasis to make your videos look professional.
How to Record an Online Course for Free
Tool: ShareX
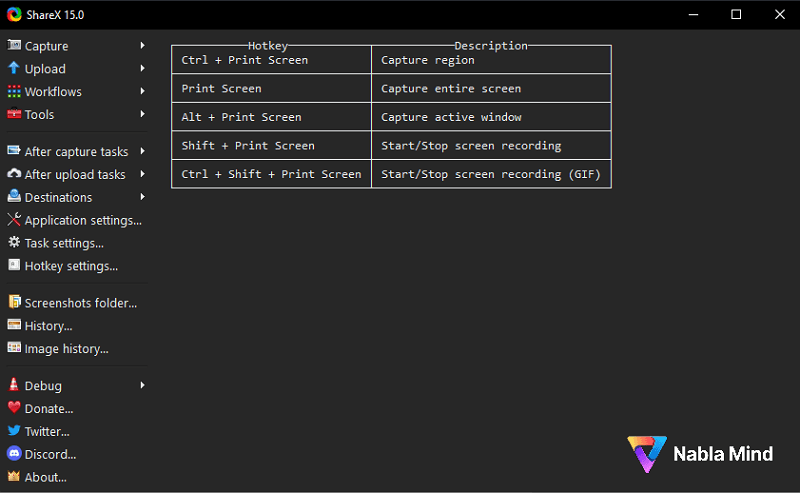
When it comes to recording classes, there are also free screen recording tools available to assist you, such as ShareX. ShareX is an easy-to-use and free tool for capturing screenshots and recording your screen. Whether you want to take a screenshot, record a video, or create a GIF on your PC, ShareX is a handy tool.
To record an online course with ShareX.
Step 1. Download and install ShareX on your computer.
Step 2. Launch ShareX and go to Task Settings > Screen Recorder.
Step 3. Set the frame rate you need and click Screen Recording Options.
Step 4. Finish the video and audio settings according to your needs.
Step 5. Press Shift + Print Screen and select the recording region to start the course recording.
Step 6. Once completed, press Shift + Print Screen to end and save the recording.
Step 7. Go to the main interface to check the video.
Wrapping Up
Depending on the platform you use for online classes, there may be a built-in recording feature available. However, when utilizing the built-in feature to record online classes, it’s important to obtain permission from the host. Additionally, if you can record the course, the platform will notify all attendees. For these reasons, it is recommended to use a third-party video recorder to freely capture an online class.
About the Author
Related Articles
-
7 Ways to Record Streaming Video | Super Easy
Check this guide and you will get the easy and detailed tips to record streaming video on your computer or mobile device.
Myra Xian Updated on -
4 Ways to Record Chrome Tab in Detail
Check this detailed guide and you will know how to record Chrome tab to perform browser tab recording with five easy ways.
Myra Xian Updated on -
4 Tips to Record Streaming Video for Free
Here you can find the freeware or online services that will help to record streaming video for free on your computer or mobile.
Myra Xian Updated on

