

Updated on
Quick Answer:
You can easily record a live stream on your Mac using SurFlex Screen Recorder for Mac, QuickTime Player (built-in screen recorder), OBS Studio (open-source software), and RecordCast (online screen recorder).
Livestream recording is needed when you want to archive the streamed content, distribute the live streaming to more channels, watch it at your convenience, and more. Thus, it’s necessary to know how to record a live stream on your device to capture streaming video for offline access. Thus, here I’d like to show you how to record a live stream on Mac using different ways. Check them in detail and use any of them to record streaming video on your Mac without any hassle.
Table of contents
How to Record a Live Stream on Mac with Audio
If you want to record a live stream on your Mac with audio, whether it’s system sound, microphone sound, or both, you will need a Mac screen recorder like SurFlex Screen Recorder. This live stream recorder allows you to capture the entire screen, a selected portion, a specific window, or even an application, with the added benefit of capturing audio alongside the video. With this Mac screen recorder, you can easily record a live stream on your Mac with audio.
Furthermore, this screen recorder provides customization options for output settings, such as video format, video quality, frame rate, and more. Whether you intend to record a YouTube live stream or go live on Facebook, SurFlex Screen Recorder empowers you to effortlessly achieve your recording goals.
To record a live stream on Mac with audio:
Step 1. Go to Settings to set up your recording preferences, and then choose the Record Screen mode.
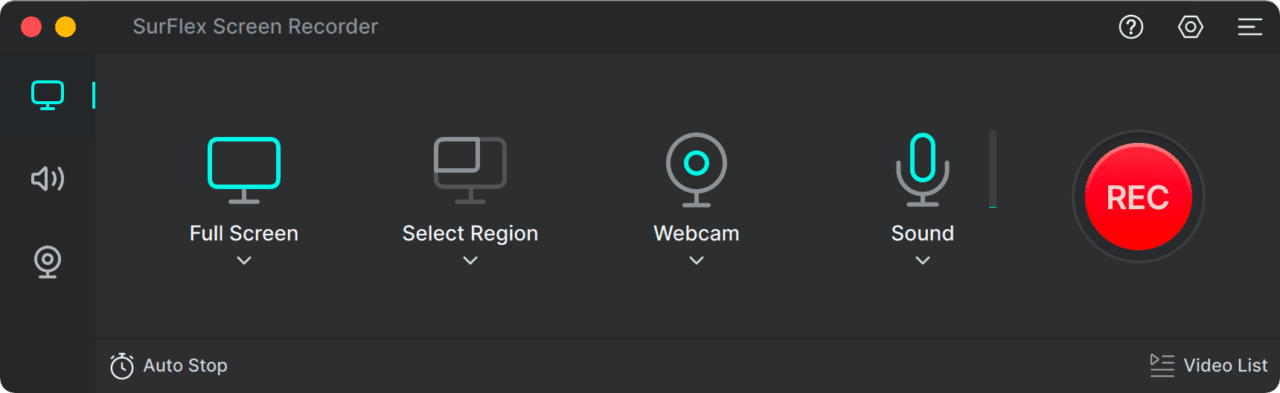
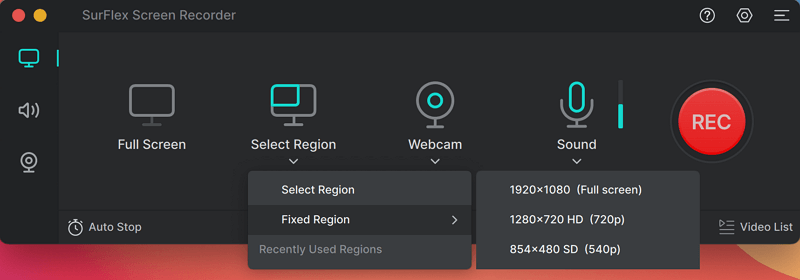
Step 2. Choose to record the Full Screen or a Selected Region and then select the target screen, window, app, or a selected portion.
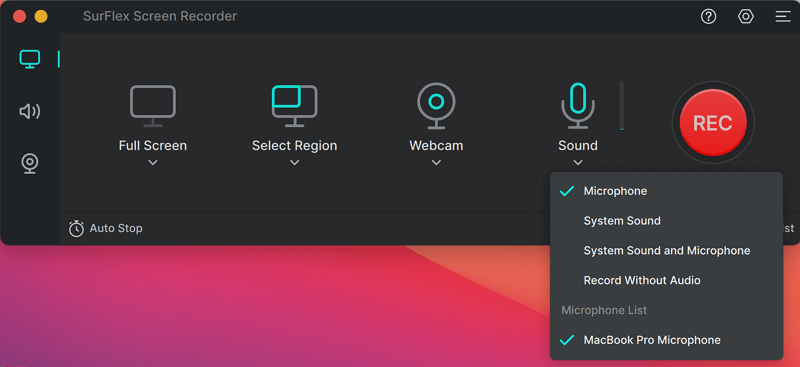
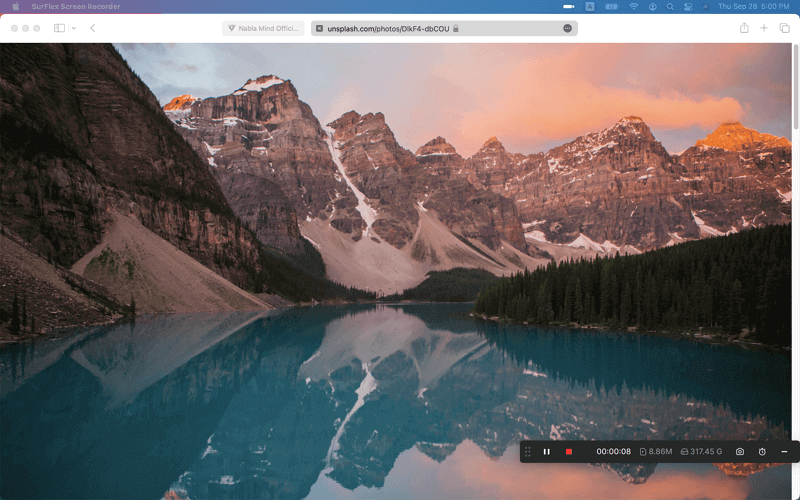
Step 3. Enable audio recording and then choose the option you need. Then click REC to start recording the live stream on your Mac.
Step 4. When you are done, click the Stop icon to stop recording.
How to Record a Livestream on Mac Without Any Software
Just like Windows has a pre-installed screen recorder that allows you to record a live stream on PC for free, Mac also has a built-in screen recorder called QuickTime Player, which can help you capture streaming video on a Mac.
QuickTime Player allows you to capture the entire screen or a selected portion. However, while it can record audio, it can only capture microphone sound. If you want to record a live stream on a Mac with internal audio, you will need to download and install a virtual audio driver on your Mac, such as BlackHole. Once installed, you can use QuickTime Player to easily record a streaming video on your Mac with sound.
Notes: You can go to the guide on QuickTime screen recording with audio to get the detailed steps to install and set up the virtual audio driver.
To record a live stream on Mac via QuickTime Player:
Step 1. Open QuickTime Player on your Mac.
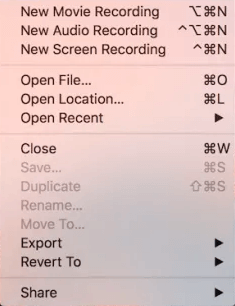
Step 2. Click File > New Screen Recording.
Step 3. Click Options and choose the virtual audio driver as the audio recording source.
Step 4. Set up other settings under Options.
Step 5. Choose Record Entire Screen or Record Selected Portion.
Step 6. When you are ready, click Record to start the livestream recording.
Step 7. Click the recording icon in the menu bar to end the recording when necessary.
How to Record Live Stream on Mac for Free
If you are looking for a free and powerful screen recorder to capture streaming video on Mac, OBS Studio is likely what you need. It offers robust screen recording features that enable you to capture streaming video and other content on your Mac. The best part is that it is a free and open-source program, allowing you to record a live stream on your computer without any cost.
The only drawback of this tool is that it can be more complex to operate compared to other screen recorders. You will need to configure the screen recording settings yourself. However, if you don’t mind this aspect, OBS Studio is a flexible solution for Mac screen recording.
To record live stream on Mac for free:
Step 1. Install OBS Studio on your Mac.
Step 2. Open OBS, go to File > Settings to select the output options.
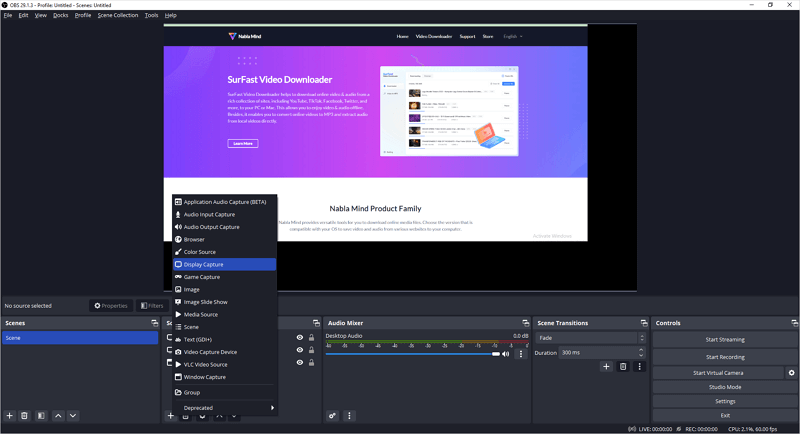
Step 3. Go to the Sources panel, click the plus icon, and choose the recording sources, such as Window Capture, Audio Input Capture, and more.
Step 4. When you are ready, click Start Recording in the Controls panel.
Step 5. Click Stop Recording when you are done with the recording.
How to Capture Streaming Video on Mac Online
Using a desktop app is not the only solution for recording streaming video on a Mac. In fact, there are many online screen recorders available to assist you, such as RecordCast. This online service enables you to record the screen (a browser tab, an app window, or the entire screen), record the screen and webcam, or record the webcam alone. During the recording process, it captures system sound, microphone sound, or both, making it suitable for recording streaming video on Mac.
However, please note that the free version only allows recording for up to five minutes each time. If this limitation does not meet your needs, you can either upgrade to the full version or try the aforementioned methods.
To capture a streaming video on Mac online:
Step 1. Open a browser on your Mac and visit RecordCast.com.
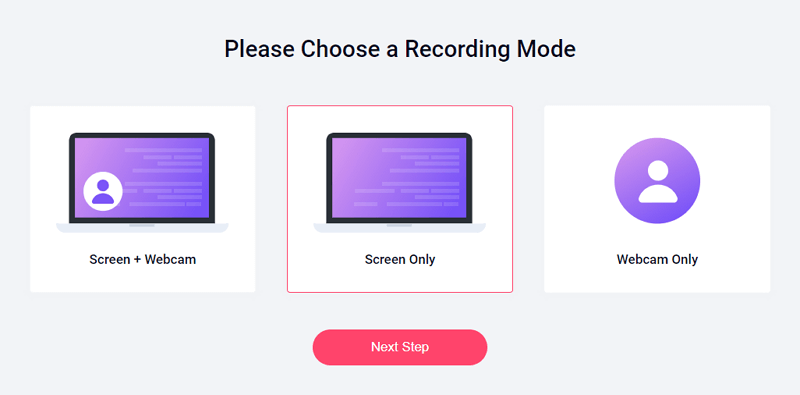
Step 2. Click Record Free Now, choose a recording mode, and click Next Step.
Step 3. Choose the audio recording option and click Start Recording.
Step 4. Select the live stream window and click Share.
Step 5. When you are finished with the recording, click Stop Sharing.
Step 6. Go back to RecordCast and click Download and Edit to save the recorded video to your Mac.
Wrapping Up
Whether you are using a MacBook Pro, MacBook Air, or iMac, you can utilize the aforementioned methods to screen record on your Mac and capture whatever you desire. The optimal approach for you may vary depending on your specific requirements. If you do not have frequent screen recording needs, using the built-in screen recorder or an online service should suffice. However, if you find yourself needing to record your Mac screen frequently, it is advisable to utilize a professional screen recorder for Mac, such as ApowerREC.
About the Author
You May Also Like
-
5 Ways to Record a Video from a Website
Check the easy tips here and you will know how to capture video from website by screen recording or video download.
Myra Xian Updated on -
6 Ways to Record YouTube Live Stream on Computer and Mobile
Whether you are using a computer or mobile, you can record YouTube live stream on your device by following the tips here.
Myra Xian Updated on -
7 Ways to Record Streaming Video | Super Easy
Check this guide and you will get the easy and detailed tips to record streaming video on your computer or mobile device.
Myra Xian Updated on