

Updated on
Quick Answer:
You can easily clip Twitch streams using the built-in Clip feature if it is available. If not, you can use third-party clipping software like SurFlex Screen Recorder (including its online version), OBS Studio, or Xbox Game Bar to make Twitch clips with a few simple clicks.
When watching or broadcasting live streams on Twitch, you may find the need to create short segments of your live streams or VODs by clipping them and sharing them to reach a wider audience. Fortunately, Twitch itself provides a clipping feature that allows you to create clips directly from the platform. Additionally, there are numerous clipping software tools available that help to clip on PC effortlessly. If you want to learn how to clip on Twitch, continue reading to check the five proven ways.
Table of contents
How to Clip on Twitch Directly
As long as the streamer has toggled on the Enable Clips option in their Clip Settings, the streamer and the viewer can create clips from the live streams or past broadcasts (VODs) from the streamer. Afterward, you can publish clips for sharing. Whether you are using a computer or mobile device, you can make a clip on Twitch using this feature.
Note: The streamer takes control over who can make clips of their channel according to factors like follow duration and subscription status. Therefore, if you find yourself can’t create a clip on Twitch, you may just not have permission to do so.
To clip on Twitch:
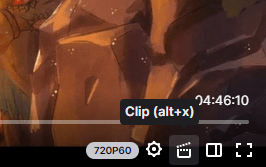
Step 1. Find the live stream or past broadcast you want to clip.
Step 2. Hover over the video (or tap the video on mobile) and click the Clip icon.
Step 3. Select the length of the clip by using the slider.
Step 4. When finished, click Publish to share it via your channel.
Want to save clips from Twitch to your computer for offline viewing? Check the guide on how to download Twitch clips for proven ways.
How to Clip Twitch Flexibly
Tool: SurFlex Screen Recorder
As mentioned earlier, not everyone has permission to clip on Twitch. Additionally, you may encounter unexpected errors or technical issues that hinder your ability to create clips as desired. This is where clipping software, such as SurFlex Screen Recorder, can assist you. By installing this tool on your computer, you can effortlessly record Twitch streams or VODs at any time and create clips in your preferred format and video quality, without being limited by the Twitch platform.
To clip Twitch:
Step 1. Open the screen recorder and click Settings to customize the output options.
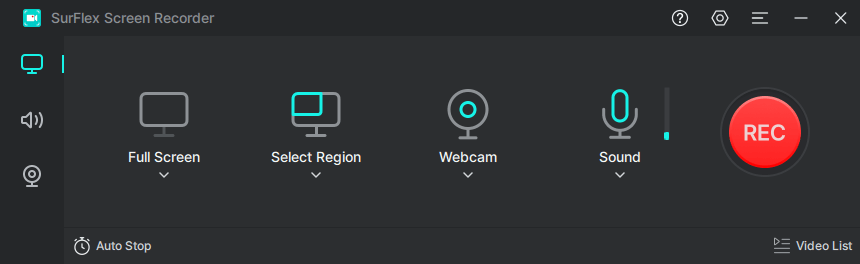
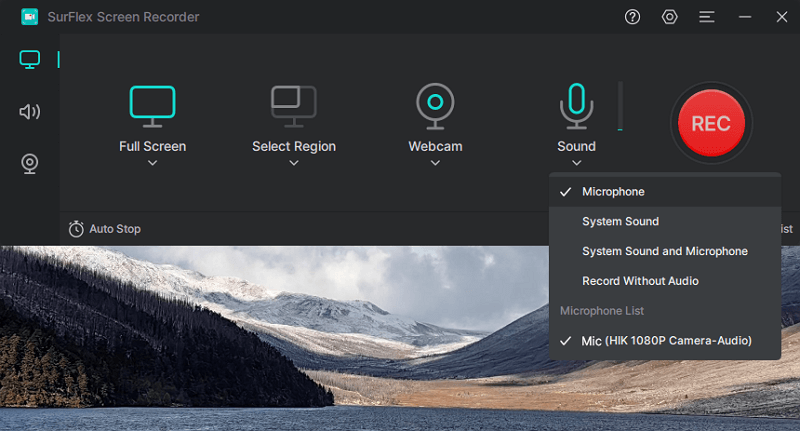
Step 2. To record the Twitch live stream, it’s necessary to enable audio recording and select System Sound so that you can record audio as well.
Step 3. Choose to capture the Full Screen or a Selected Region according to your preferences.
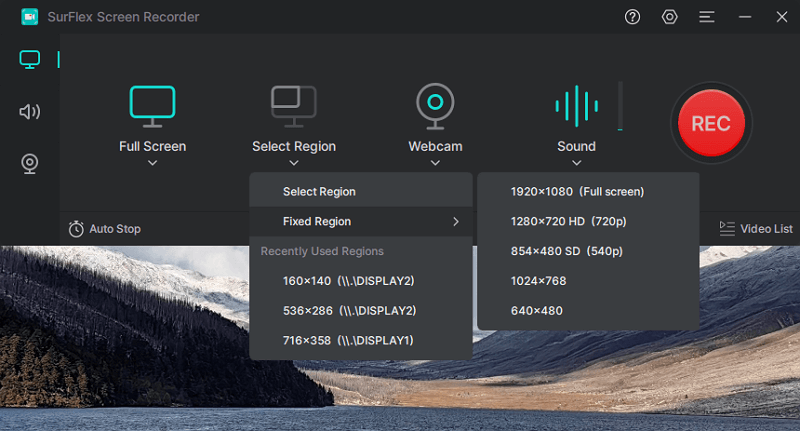
Step 4. Select the target area and then click REC to start recording the Twitch stream.
Step 5. After you capture the desired video, click Stop and check the video in the popup video list.
You can also choose to download Twitch streams to your computer and create clips offline.
How to Clip Twitch Stream Online
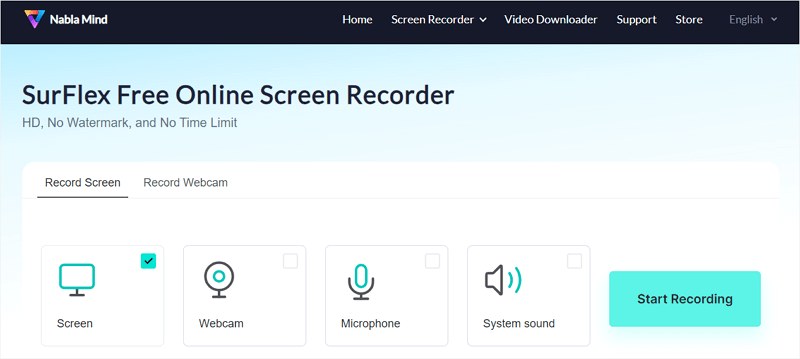
Tool: SurFlex Online Free Screen Recorder
There are also web-based clipping tools available for creating Twitch clips, such as SurFlex Online Free Screen Recorder (compatible with Chrome, Firefox, Safari, and Edge). This 100% free service allows you to make Twitch clips in HD quality without any watermarks or time limits. If you prefer to clip a Twitch stream without installing any software, this online service will come in handy.
To clip a Twitch stream online:
Step 1. Visit Twitch from your browser and open the live stream or past broadcast you want to clip.
Step 2. Open a new tab and visit SurFlex Online Free Screen Recorder.
Step 3. Choose Screen and System Sound and click Start Recording.
Step 4. Choose to record a browser tab and select the Twitch page.
Step 5. Click Share to start recording the Twitch clip.
Step 6. When you are done, click Stop Sharing.
Step 7. Go back to the online recorder and click Download to save the Twitch clip to your computer.
How to Make Clips on Twitch for Free
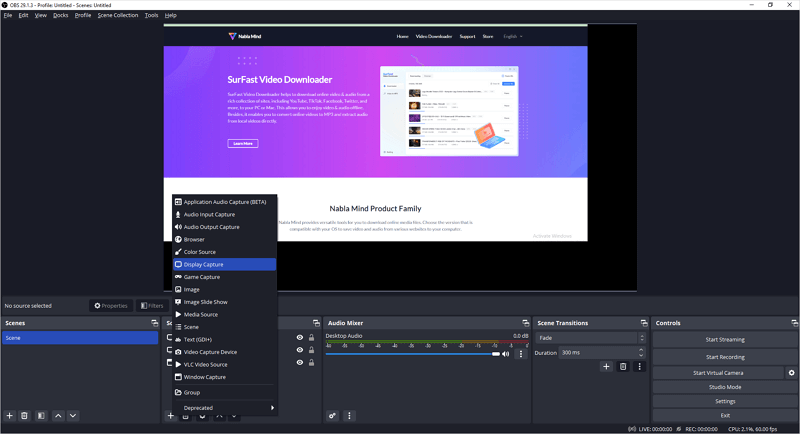
Tool: OBS Studio
Another excellent option for clipping software is OBS Studio. This free screen recorder enables you to capture any portion of your screen with audio and provides customization options for output settings based on your preferences. In addition to its usefulness for clipping on Twitch, OBS Studio is also valuable in various other screen recording scenarios. If you frequently need to record videos on your computer, don’t hesitate to give it a try.
To make a Twitch clip:
Step 1. Download and install OBS Studio on your computer.
Step 2. Launch OBS Studio and head to Flie > Settings > Output to select the video format you like. Then click Apply.
Step 3. Go to the Sources panel and add the recording sources you need.
Step 4. Make sure the Twitch window is selected and click Start Recording.
Step 5. Once done, click Stop Recording and go to File > Show Recordings to check the clip.
How to Create Clips on Twitch Without Any Software
Tool: Xbox Game Bar
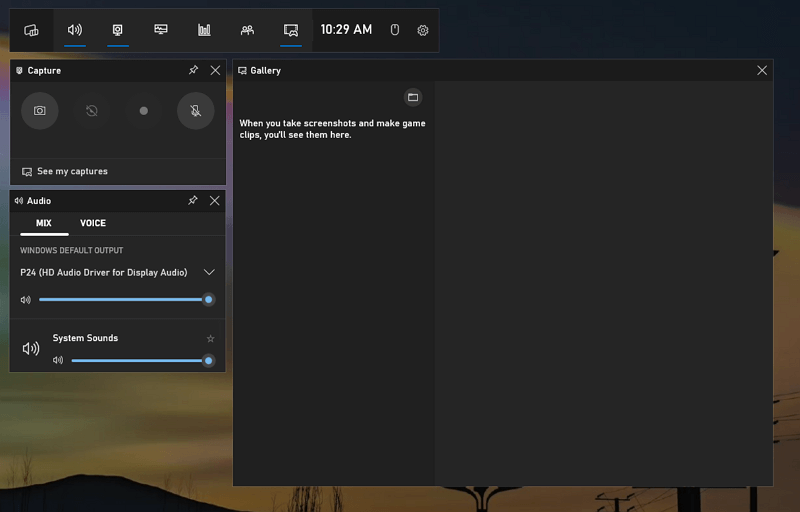
If you are using Windows 10 or a later version, you have access to a built-in screen recorder called Xbox Game Bar, which allows you to clip on Twitch without the need for third-party tools. This convenient tool enables you to record an app window, including audio, using a shortcut. With Xbox Game Bar, you can easily create Twitch clips whenever you desire, without incurring any additional costs. If you intend to clip on Twitch using a Windows computer, this native screen recorder is worth trying.
To create a Twitch clip with Xbox Game Bar:
Step 1. Go to Start > Settings > Gaming > Captures to set up the video output settings.
Step 2. Then go to Xbox Game Bar > Settings > Widgets to select the audio recording option.
Step 3. Go to Twitch and prepare the live stream or VOD you want to record.
Step 4. Press Windows + Alt + R to start clipping on Twitch.
Step 5. After capturing your desired content, press Windows + Alt + R again to end and save the clip to your computer.
Step 6. Go to Videos > Captures to check the Twitch clip.
Wrapping Up
If you are wondering how to clip on Twitch using your mobile device, there is an additional solution apart from using the built-in clip feature on Twitch. You can utilize the native screen recording feature on your phone or tablet. When you wish to create a Twitch clip, simply open the control center, tap the Record icon, and you will be able to clip on Twitch effortlessly.
About the Author
Related Articles
-
How to Record Twitch Streams: The Ultimate Guide
Whether you are going to record your own or someone else's Twitch stream, read this guide and you will know how to record Twitch streams.
Myra Xian Updated on -
How to Record a Live Stream on Android in 2 Ways
You will know how to record a live stream on Android in 2 ways. Apply it to record a YouTube live stream easily.
Myra Xian Updated on -
How to Record Online Classes in 3 Ways
You will know how to record online classes on your computer using three ways. Use any of them to capture the content you need.
Myra Xian Updated on