Quick Answer:
You can use the keyboard combination as a shortcut to record your screen on a Mac: Shift + Command + 5
Thanks to macOS, it has a built-in screen recording feature that enables you to directly record screen on Mac using a keyboard shortcut, without using any third-party screen recorder. (Simply press Shift + Command + 5 simultaneously.) If you want to know how to record screen on Mac via Shortcut, read on to know everything about this method and learn how to record screen on Mac with audio, including system sound and microphone audio.
Table of contents
Overview of Mac Screen Record Shortcut
The screen recording shortcut on Mac is provided by the Screenshot app, which not only helps to take screenshots but also works to capture your Mac screen. There are the key points about this method you need to know:
- It allows you to record the entire screen or record a selected portion.
- It helps to capture Mac screen with sound (external sound only).
- It will export the video recording as MOV files only.
If you only want to record audio on Mac or want to perform screen recording with internal audio on Mac, only using the Screenshot app is not enough. However, using a shortcut to record the screen on a Mac can still meet the majority of screen recording needs. Follow the next parts to learn how to perform screen recording on your macOS without strain. (You can also record screen with audio via QuickTime.)
How to Record Screen on Mac via Shortcut (with External Audio)
As mentioned above, using the shortcut allows you to capture your Mac screen with external audio, namely microphone sound. (Of course, you can choose to record screen without sound if needed.)
To record screen on Mac via shortcut:
Step 1. Press Shift + Command + 5 at the same time on your keyboard.
Step 2. Choose Record Entire Screen or Record Selected Portion.
Step 3. Click Options to set the storage path, timer, and audio input.
Step 4. Click Record to start.
Step 5. To stop, you can click the recording icon on the top of the screen, press Command + Control + Escape, or tap Stop on your Touch Bar.

Notes: In Step 3, if you want to record the screen on your Mac without sound, choose None in the Microphone section. If you prefer to capture screen and sound, check the [Device] Microphone option instead.
How to Record Screen on Mac via Shortcut (with Internal Audio)
Using keyboard shortcuts disallows you to screen record Mac with internal audio. When you need to record Mac screen with internal audio, how can you do it?
Actually, it is possible to achieve this, but the process can be relatively complex. You need to install an audio driver and set it up in the Audio MIDIS Setup. After that, when you use the screen recording shortcut on your Mac, you can select this driver to record the system audio.
Here I’d like to take the BlackHole Audio Loopback Driver as an example. Before you start, download and install BlackHole on your MacBook following its official site.
To screen record on Mac with internal audio via Shortcut:
Notes: The steps below are operated on MacBook Pro. Some of the options may vary depending on the device and macOS you use.
Step 1. Launch Audio MIDI Setup, click the plus icon, and then choose Create Multi-Output Device.
Step 2. Select the newly created Multi-Output Device, select BlackHole 2ch and MacBook Pro Speakers, and check Drift Correction next to the speaker.
Step 3. Click Shift + Command + 5 to open the screen recording feature and select the screen you want to capture.
Step 4. Click Options and choose BlackHole 2ch under Microphone.
Step 5. Click Record and now you can record your Mac screen with the system sound.
Step 6. To stop the Mac screen recording, tap Stop on the Touch Bar or click the Recording icon at the top of the screen.

How to Record Screen on Mac with External and Internal Audio
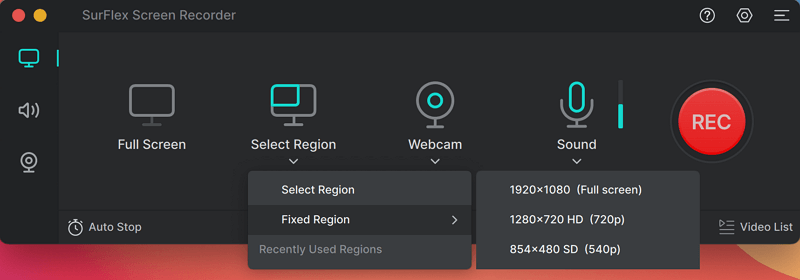
As you can see from the details above, even if you can record internal audio on Mac with the help of an audio driver, you can’t capture both external and internal audio simultaneously using keyboard shortcuts. If that’s what you want, you will need a third-party screen recorder for Mac, such as SurFlex Screen Recorder, to get it done. It can do more than using the keyboard command:
- Record camera on Mac
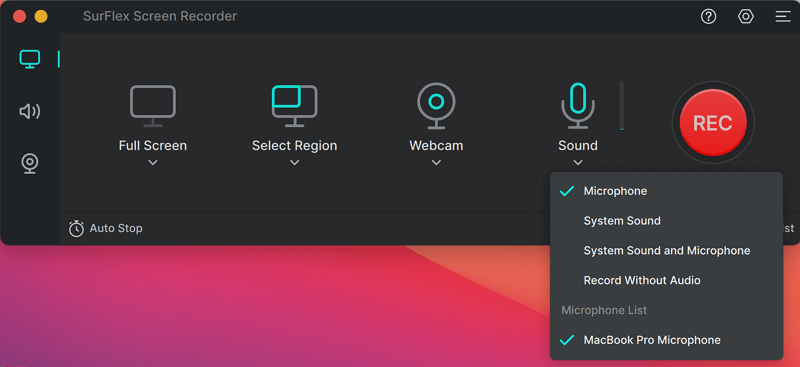
- Record screen on Mac with system sound, microphone, or both
- Customized output format, definition, frame rate, and more.
If you prefer a more flexible screen recording solution, using a third-party professional tool can better meet your needs.
To record screen on Mac with audio:
Step 1. Go to Settings to set up your recording preferences, and then choose the Record Screen mode.

Step 2. Choose to record the Full Screen or a Selected Region and then select the recording area. Here you can customize a suitable dimension for YouTube.

Step 3. Enable audio recording, select System Sound, and then click REC to start the Mac screen recording.

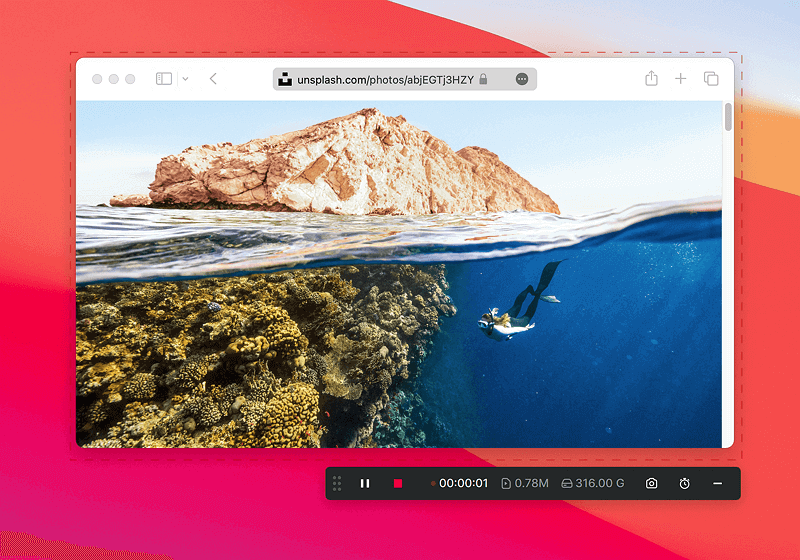
Step 4. When needed, click the Stop button to end the recording and then preview the video.

FAQs on Screen Record on Mac via Shortcut
When you record your Mac screen, you may also want to know:
QuickTime Player allows you to record your MacBook screen with sound:
Launch QuickTime on your MacBook.
1. Go to File and choose New Screen Recording.
2. Select to capture the entire screen or selected portion.
3. Click Options and choose your microphone as the audio input.
5. Click Record to start recording screen with sound on your MacBook.
You can use the screen recording feature provided by the Screenshot app to record Mac screen without using QuickTime Player. You can use Shift-Command-5 to launch Screenshot and then capture the screen directly.
On your Mac, press Shift-Command-5, and then you will see the control panel of the screen recorder. Set up the settings, and click Record to start recording.
Wrapping Up
It’s quite easy and straightforward to record screen on Mac with audio using the short key. However, it’s not the optimal that is suitable for all situations. It natively helps to capture screen and external audio on your Mac. However, when you need to catch internal audio, you will need to install and set up an audio driver. When you need to capture system sounds and microphone input at the same time, it won’t help at all. Specify your needs and pick up the most suitable way to apply.
About the Author
You May Also Like
-
How to Record a Video on a Mac in 5 Ways
Whether you want to record yourself or your screen, you will know how to record video on Mac with five proven ways.
Myra Xian Updated on -
How to Record MP4 on Mac in 4 Ways
After reading this guide, you will know how to record MP4 on Mac with easy and flexible screen recorder tools or services.
Myra Xian Updated on -
How to Record Screen on Mac with Audio from Video
You will know how to record screen on Mac with audio from video easily with either free or Paid method. Pick up the way you like to apply.
Myra Xian Updated on

