Quick Answer:
You can capture streaming audio on your Mac or PC easily with Chrome Audio Capture (Chrome extension), SurFlex Screen Recorder (easy audio recorder), Audacity (open-source audio recorder and editor), or OBS Studio (open-source screen recorder). What’s more, you can choose to download streaming audio directly.
At some point, you may find yourself wanting to record online music or capture streaming audio for offline listening or other purposes. Fortunately, much like the ease of downloading streaming audio, there are also tools available for recording streaming audio, regardless of whether you use a Mac or PC. If that’s what you want, read on to learn how to record streaming audio in four proven ways.
Table of contents
Record Streaming Audio online
Tool: Chrome Audio Capture
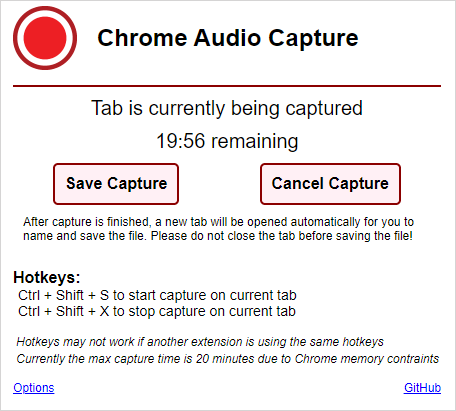
If the audio you intend to record is less than 20 minutes, it is recommended to try Chrome Audio Capture, an audio recording extension, to record audio from a website online. It offers an online streaming audio recording service, allowing you to record and save browser audio in high-quality MP3 or WAV format. That’s why you can also use it to record audio from YouTube or other sites.
The only drawback is its performance when it comes to recording long audio, as it may have difficulty saving the recording properly. However, if you only need to record short audio files, it is a good choice to consider.
To record streaming audio for free:
Step 1. Add Chrome Audio Capture to your browser and pin it to the toolbar.
Step 2. Visit the website you want to rip streaming audio from and prepare the target audio.
Step 3. Click the audio recording extension and click Start Capture.
Step 4. Click Save Capture to end the recording when necessary.
Step 5. On the new page, click Save Capture, rename the audio file, and then click Save.
Step 6. Go to the Downloads folder on your Mac or PC to check the recording.
Record Streaming Audio on Mac or PC Easily
Tool: SurFlex Screen Recorder
Whenever you need to record streaming audio on Mac or PC, you can rely on the powerful screen recorder, SurFlex Screen Recorder, to capture the desired content. While primarily functioning as a screen recorder, it also features audio recording capabilities, allowing you to record audio only on your Mac or Windows PC. As a result, it is the perfect fit when seeking a streaming audio recorder.
When it comes to recording audio from the internet, SurFlex Screen Recorder excels at capturing internal sound, external sound, or both. This makes it an excellent tool for recording audio from websites and effortlessly capturing streaming audio or music.
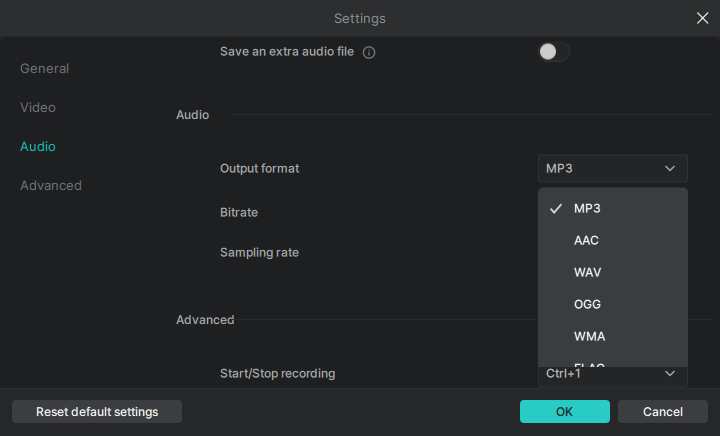
Additionally, this audio recorder offers a wide array of audio formats to choose from, including MP3, WAV, OGG, FLAC, and more (yes, you can use it to record from YouTube to MP3). If you desire enhanced flexibility during sound recording, utilizing SurFlex Screen Recorder will undoubtedly meet your requirements.
To record streaming audio on Mac or PC:
Step 1. Launch SurFlex Screen Recorder and then choose the Record Audio mode.

Step 2. Click Settings to customize the audio output options according to your preferences and then click OK.
Step 3. To record streaming audio, choose System Sound among the audio recording options and then click REC.
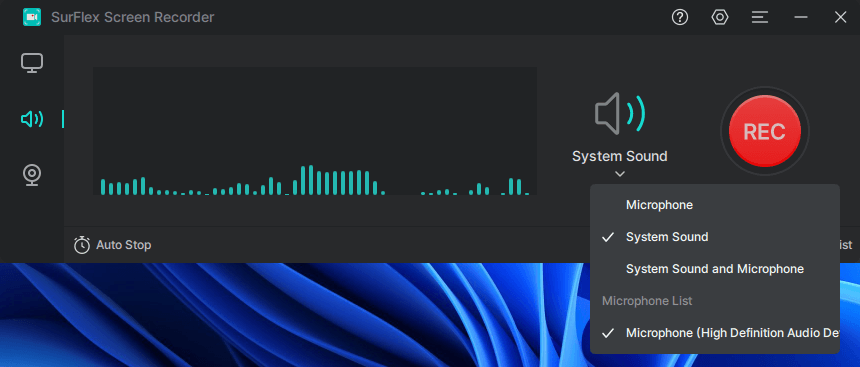
Step 4. When you are finished with the audio recording, click Stop.

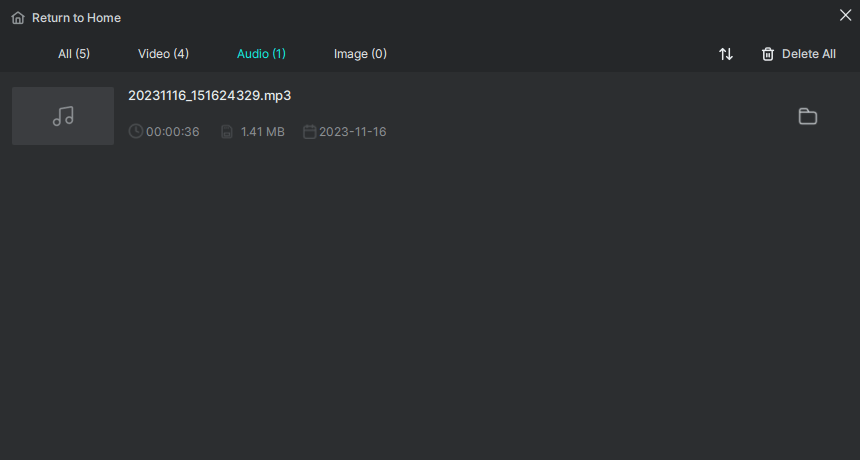
Step 5. Check the audio file in the popup window.
Capture Streaming Audio via Audacity
Tool: Audacity
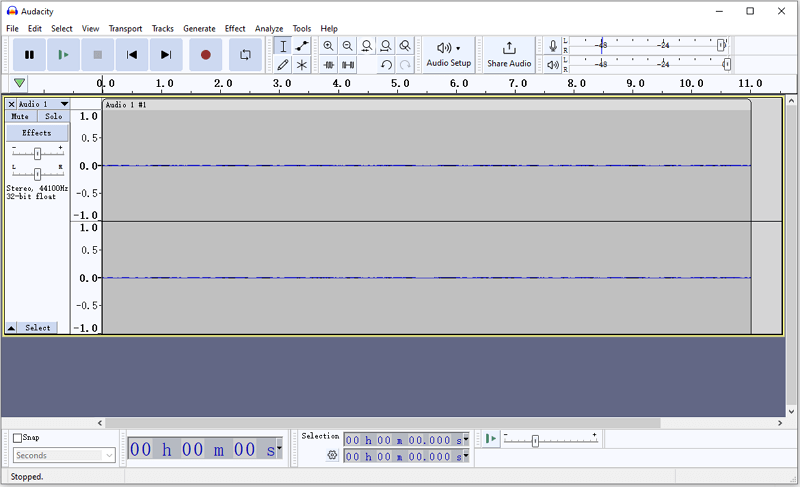
Audacity is undeniably one of the most popular solutions for recording streaming audio on both Windows and macOS platforms. As a free and open-source audio recorder and editor, it is certainly worth considering. The freeware allows you to record computer audio or microphone sound in formats such as MP3, WAV, or OGG.
Furthermore, it provides essential audio editing features that enable you to refine and enhance your recordings according to your preferences. If your intention is not only to capture audio streams but also to edit the resulting audio file, it is highly recommended to utilize Audacity.
To record streaming audio with Audacity:
Step 1. Download and install Audacity on your PC or Mac.
Step 2. Find Audio Setup in the menu bar. First go to Host and choose Windows WASAPI. Then go to Recording Device to choose the speaker.
Step 3. Click the red record button to start the recording.
Step 4. Click the Stop button to end recording when you are done.
Step 5. Edit the audio and then go to File > Export to save the audio file in MP3, WAV, or OGG.
Record Streaming Audio with FineVoice
Tool: FineShare FineVoice
As an AI voice studio software, FineVoice provides a set of audio-related tools such as voice generator and audio transcriber. For users who want to record streaming audio, FineVoice also has a voice recorder that allows you to record from multiple sources. You can record audio from applications, web browsers, and external devices like your microphone.
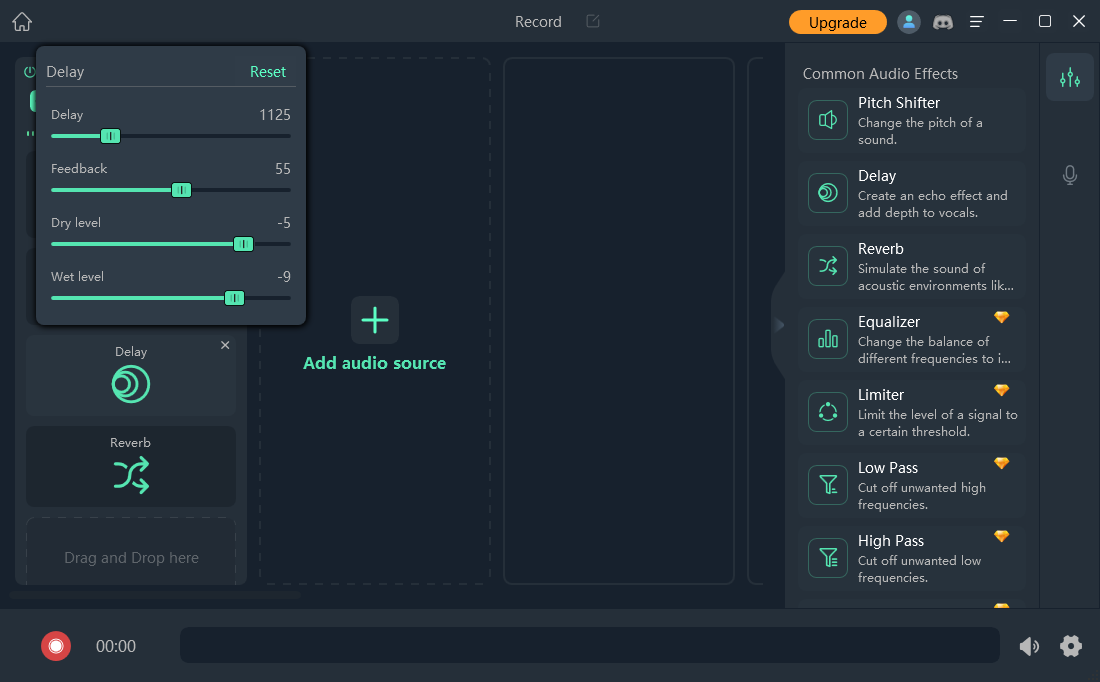
What’s more, you can add various audio effects to each audio source while recording and even adjust details of the effects to get the ideal streaming audio recordings.
To record audio with FineVoice, just follow these four steps:
Step 1. Choose Voice Recorder on FineVoice homepage, and click Add audio source to add what you want to record.
Step 2. Drag Audio Effects from the right panel to the sources and change details to your liking.
Step 3. Change the output format in settings, then click the record button, choose a Recording Mode and start recording.
Step 4. After finish recording streaming audio, the files will be saved in My Library panel.
Record Streaming Audio for Free
Tool: OBS Studio
While the aforementioned methods provide free options for capturing audio streams, it is not a bad idea to introduce an additional choice – OBS Studio. It is a viable option if you intend to record streaming video with audio. Even if you only require the audio, you can easily convert the recorded video to any desired audio format using an online file converter like CloudConvert.
To capture streaming audio for free:
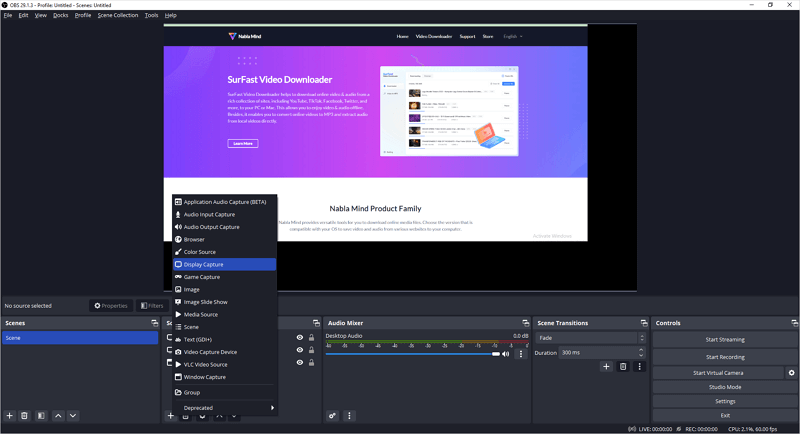
Step 1. Open OBS Studio and go to the Sources panel.
Step 2. Click the plus icon to add the recording sources you need, such as Audio Output Capture.
Step 3. Prepare the audio you’d like to record and click Start Recording in the Controls panel.
Step 4. When you are done, click Stop Recording and then go to C:/Users/admin/Videos to locate the recording file.
Step 5. Convert the file to any audio format you like via CloudConvert.
Bonus Tip: Download Streaming Audio
Tool: SurFast Video Downloader
If your goal is to capture streaming audio from popular websites such as YouTube, TikTok, Facebook, Twitter, and Vimeo, you have the option to download the streaming audio instead of recording it. This can be accomplished using an audio downloader like SurFast Video Downloader.
This tool is designed to extract online audio from various websites and save it in formats such as MP3 or WAV. If you need to rip long audio, utilizing such a tool will prove to be efficient and effective in achieving your objective.
To download streaming audio:
Step 1. Go to SurFast Video Downloader and click the lightbulb icon to access the Smart Download mode.
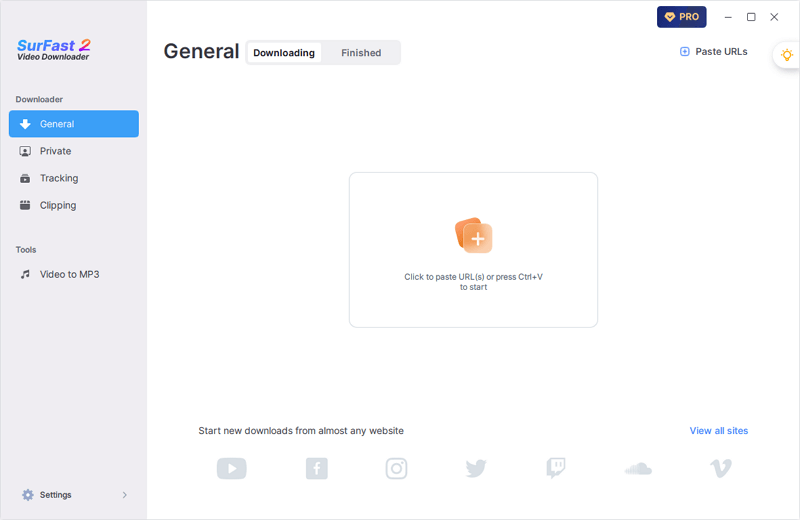
Step 2. Select Audio and process to its settings to choose the audio output format and quality. Then turn on Always use the above settings.
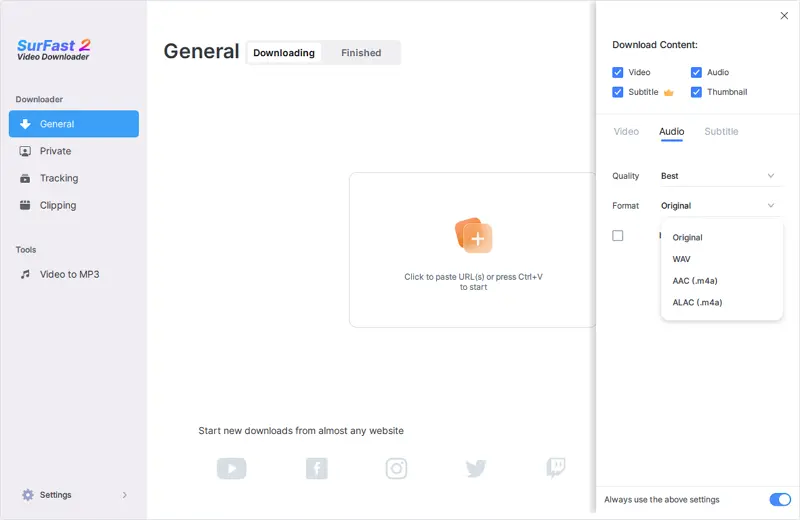
Step 3. Paste the video or audio link to SurFast Video Downloader and it will start capturing streaming audio immediately.
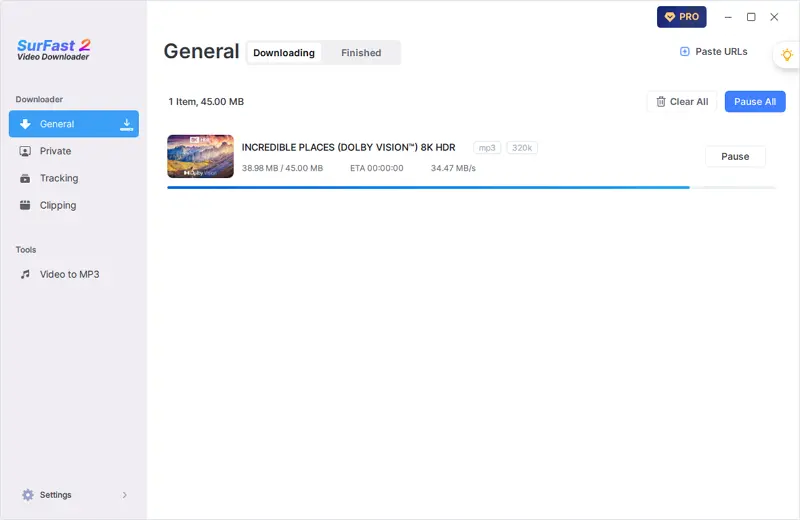
If you only see video download options, you can download the video first and then use the Video to MP3 feature to capture audio from the video.
Wrapping Up
Ripping streaming audio from websites is generally not a difficult task. If you only wish to record audio from your browser, using Chrome Audio Capture is the recommended choice. However, if you frequently need to record audio and video from various sources on your computer, opting for a professional video and audio recording tool like SurFlex Screen Recorder is a comprehensive and all-in-one solution. This will provide you with the necessary features and capabilities to capture both audio and video content effectively.
About the Author
Related Articles
-
How to Record Audio on Windows 10 | New Tips
Whether you want to capture the system sound or your own voice, you will know how to record audio on Windows 10 in easy tips here.
Myra Xian Updated on -
4 Easy Ways to Record Podcast on Mac
Check this guide and you will get five easy ways that show you how to record podcast on Mac, either with the built-in or third-party apps.
Myra Xian Updated on -
How to Record Audio on PC Without Microphone: New Update
Check this guide and you will know how to record audio on PC without microphone to capture computer audio easily.
Myra Xian Updated on

