Quick Answer:
You can record yourself on Zoom in different situations using Zoom or third-party screen recording tools.
Table of contents
Can You Record Yourself on Zoom
Yes, you can record yourself on Zoom by starting a meeting on your own. Although Zoom is mainly used as a tool for online conferences, webinars, and classes, it can also function as a screen recorder thanks to its built-in screen recording feature. Whether you want to record a video of yourself or record yourself presenting a PowerPoint, you can accomplish this using Zoom.
If that’s what you’re looking for, don’t hesitate to check this guide for a step-by-step explanation of how to record yourself on Zoom. (You can use the same tips to record a Zoom meeting on a computer.)
Note: The free version of Zoom currently limits each meeting to a maximum duration of 40 minutes. When you need to record on Zoom using a free account, you should be aware of this time restriction.
How to Record Yourself on Zoom
To record yourself on Zoom, you need to start a Zoom meeting since the Record option is available by default only for the host. Besides, you need to make sure the integrated camera on your computer or the external webcam connected to your computer works properly so that you can record a video on Zoom successfully. After these preparations, follow the steps below to record yourself using your PC, laptop, or Mac with a few simple clicks.
To record yourself on Zoom:
Step 1. Open the Zoom app and click New Meeting.
Step 2. In the prompt, check Join with Computer Audio if you need to.
Step 3. Enable the camera by clicking Start Video.
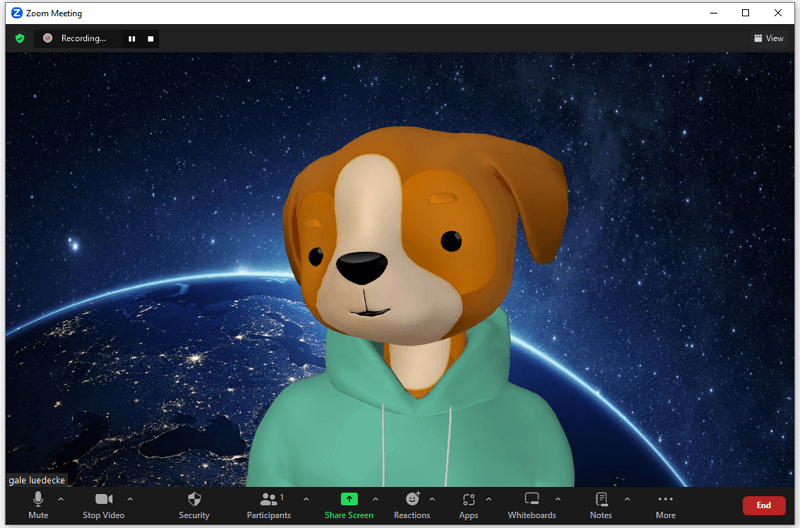
Step 4. If you need to use a virtual background, video filter, or avatar, click the drop-down menu next to the Start/Stop Video option to choose the one you like.
Step 5. When you are ready, click the Record button in the middle of the menu or click More > Record on This Computer.
Step 6. When you finish the recording, click the Stop button or go to More > Stop Recording to end the recording.
Step 7. Click End > End Meeting for All and wait for Zoom to convert the recording.
Step 8. Go to Meetings > Recorded to check the recording.
How to Record on Zoom by Yourself
As mentioned earlier, when you are the host of a meeting in Zoom, the platform automatically grants you screen recording permissions. Therefore, when you need to record on Zoom by yourself, whether it is a meeting or a presentation, you must create a meeting on your own and utilize the Record button specifically provided for you. This way, you can freely capture videos you need.
To record on Zoom by yourself:
Step 1. Ensure your webcam and microphone work properly.
Step 2. Launch the Zoom app and choose New Meeting.
Step 3. In the Audio section, set up your microphone and the audio settings.
Step 4. Enable the webcam by clicking Start Video and clicking its drop-down menu to choose a virtual background, video filter, or avatar when needed.
Step 5. When you are ready, click the Record button or go to More > Record on this Computer to start recording on Zoom.
Step 6. When you are done, click the Stop button in the top-left corner or press Alt-R to end the recording.
Step 7. End the meeting and go to Home > Meetings > Recorded to check the video.

How to Video Record Yourself Presenting a PowerPoint on Zoom
If you not only want to record your webcam but also want to record a Presentation on Zoom, then follow the steps in this part to get it done. With Zoom’s screen-sharing feature, you can also record yourself with slides easily.
Here I’d like to show you how to record yourself on Zoom with PowerPoint. You can follow the same steps to record slides made by other programs.
To video record yourself presenting a PowerPoint on Zoom:
Step 1. Make sure your microphone and camera function properly.
Step 2. Open the presentation you’d like to record, launch Zoom, click New Meeting, and enable Join with Computer Audio.
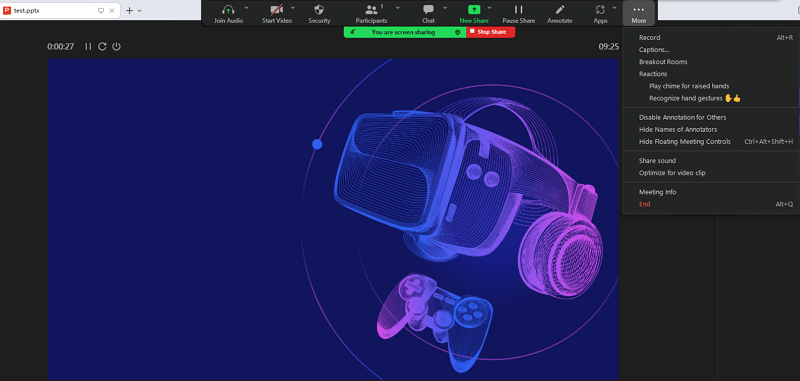
Step 3. Click Share Screen, choose PowerPoint, and then click Share.
Step 4. Prepare the presentation and adjust the size and position of the webcam overlay according to your needs.
Step 5. To start the recording, click More > Record from the menu bar.
Step 6. When you are done, click More > Stop Recording.
Step 7. Click Stop Sharing and end the meeting.
Step 8. Wait for Zoom to convert the recording and go to Home > Meetings > Recorded to access the recorded video.
Personally, using Zoom to record a PowerPoint presentation is not an effective choice. First of all, PowerPoint itself has a screen recording option that allows you to record a PowerPoint presentation with audio, video, and annotation. Secondly, there are many easy screen recorders that make it easy and straightforward to record a presentation. Therefore, it’s advisable to try these easier solutions to video record yourself presenting a PowerPoint.
How to Record a Video on Zoom Without a Meeting
Zoom’s screen recording feature is only available in a meeting. Thus, If you want to record a video on Zoom without a meeting, you will need the help of a third-party screen recorder like SurFlex Screen Recorder. It provides rich screen recording features and options and enables you to capture any video or audio you need.
You can use SurFlex Screen Recorder to record a Zoom meeting, record a PowerPoint presentation, capture a video without a meeting, and more. If you not only want to record yourself on Zoom but also need to screen record on computer in many other situations, getting such a professional screen recorder is the optimal choice.
To record a video on Zoom without a meeting:
Step 1. After the installation, launch SurFlex Screen Recorder and go to Settings to customize the output settings.

Step 2. If you want to record a video with audio, turn on audio recording and choose the option you need.
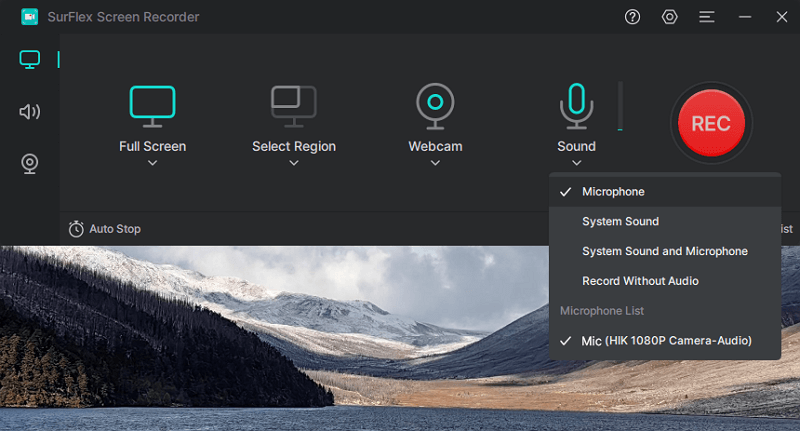
Step 3. Select the Zoom window you’d like to capture and then click REC to start recording a video on Zoom.
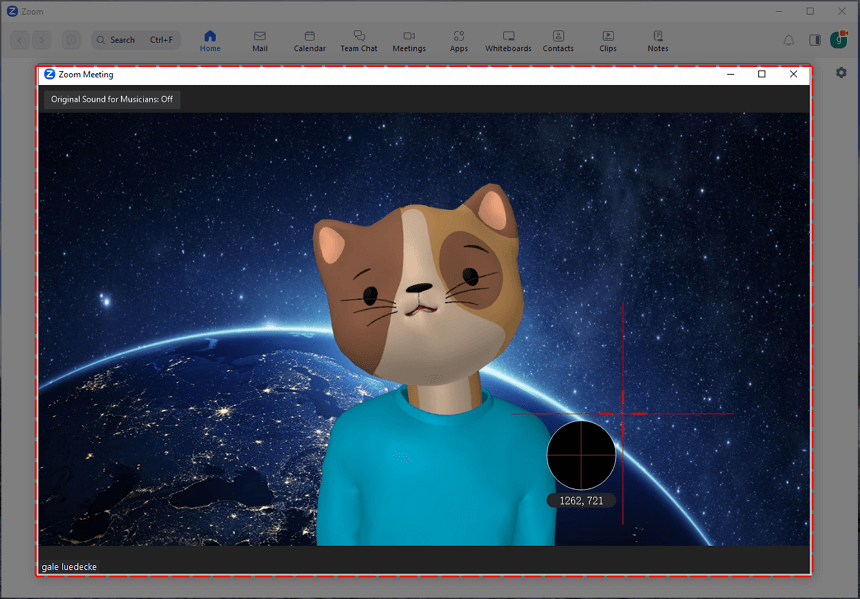
Step 4. When necessary, click the Stop button to end the recording.
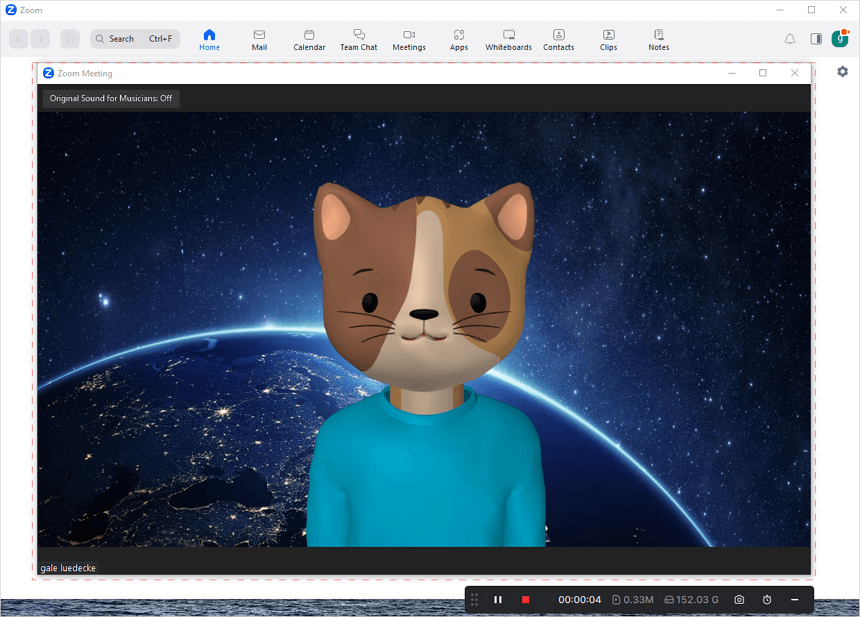
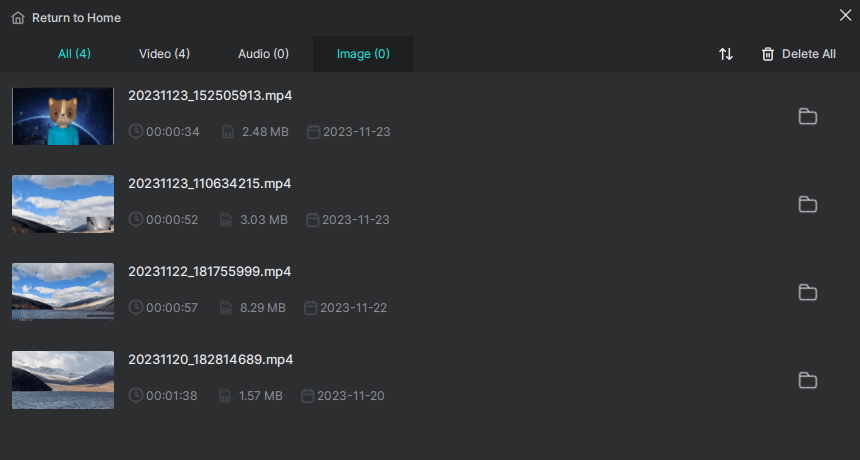
Step 5. Check the video in the recording list.
Wrapping Up
There are more convenient alternative methods available for both recording yourself and recording a presentation than using Zoom. For instance, on Windows, you can utilize the built-in Camera app, while on Mac, the Photo Booth app allows you to record a video via webcam at no cost.
However, Zoom has its advantages such as being free for meetings that last less than 40 minutes, offering virtual backgrounds, video filters, and avatars, as well as providing a wide range of features. It is important to specify your specific needs and choose your preferred method to capture whatever content you desire.
About the Author
Related Articles
-
How to Record Google Meet on Laptop: 4 Tips
This guide will show you how to record Google Meet on a laptop with audio. Choose any of the methods to capture the content you want.
Myra Xian Updated on -
4 Ways to Record Meeting: Zoom, Teams, Google Meet, and More
If you want to record meeting and don't know how to do it, check this guide and you will know the esay tips for meeting recording.
Myra Xian Updated on -
4 Tips: How to Record Webex Meeting on All Devices
Whether you are using a computer or mobile device, you will know how to record a Webex meeting on your device successfully.
Myra Xian Updated on

