Quick Answer:
You can easily record your voice on laptop by using the built-in Voice Recorder (for Windows 10), Sound Recorder (for Windows 11), or a third-party audio recorder such as SurFlex Screen Recorder or Audacity.
Voice recording is helpful for creating podcasts, narrations, or other important audio content. Therefore, it is necessary to learn how to record voice on laptop so that you can smoothly capture your voice when needed. Whether you prefer to use a built-in app or a third-party professional tool, you can find the corresponding solution that suits your needs.
Note: The ways to record microphone sound on a laptop depend on the version of the OS rather than the computer brand. Thus, whether you want to record audio on an HP laptop or a Dell laptop, you can use the same tips to get it done.
Table of contents
How to Record Voice on Laptop in Windows 10
Tool: Windows 10 Voice Recorder
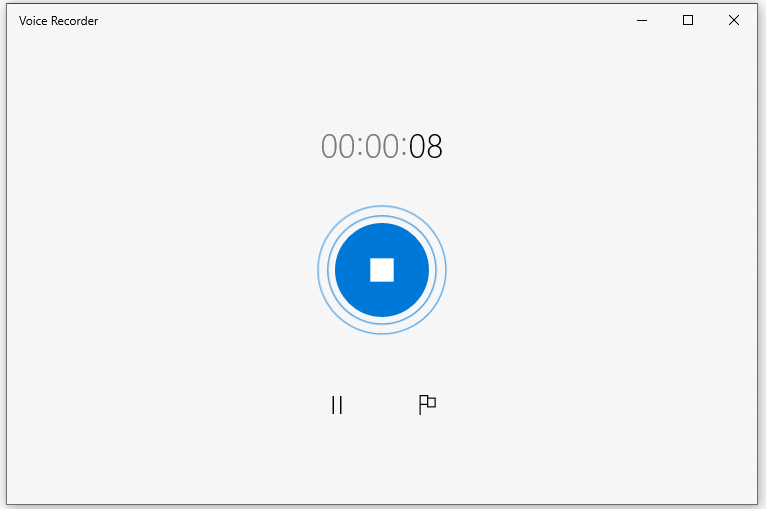
To record voice on Windows 10 laptops, you can utilize the preinstalled Voice Recorder. This application is capable of capturing sound from the integrated microphone or an external microphone connected to your laptop. It will save the audio recording in M4A format, which is supported by many podcast apps.
Additionally, after recording your voice with Voice Recorder, you can trim the audio file to remove any unneeded parts. If these features are sufficient to meet your requirements, you can use this free and user-friendly app to capture your voice via your laptop with just a few simple clicks.
To record voice on laptop in Windows 10:
Step 1. Open Voice Recorder from the Start menu.
Step 2. Click Record or press Ctrl-R to start recording sound.
Step 3. Click Stop when you are done.
Step 4. Trim the audio recording and rename the file.
How to Record Voice on Laptop in Windows 11
Tool: Windows 11 Sound Recorder
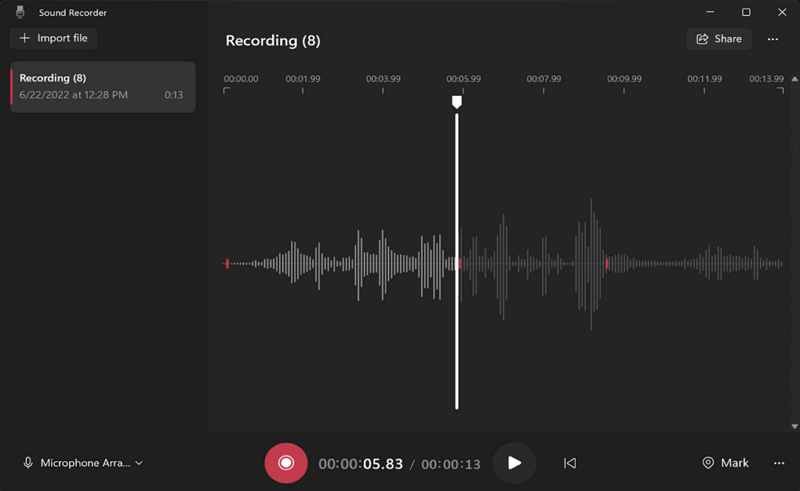
Windows 11 also has its built-in audio recorder called Sound Recorder which allows you to record audio on Windows 11. Similar to Voice Recorder, Sound Recorder also works to record audio on a laptop via a microphone and thus enables you to record your voice. However, Sound Recorder provides more audio formats for you to choose from, including MP3, M4A, WAV, FLAC, WMA, and more. If you want to capture microphone sound on your laptop only, Sound Recorder will come in handy.
To record voice on Windows 11 laptop:
Step 1. Open Sound Recorder on your laptop.
Step 2. Press Control-R or click Record to start recording audio.
Step 3. Click the Stop button to end the recording when you are done.
How to Record Audio on Laptop in All Windows Versions
Tool: SurFlex Screen Recorder
Regardless of the Windows version you are using and the type of audio you want to capture, you can rely on SurFlex Screen Recorder to record audio on your laptop. Unlike the preinstalled app on your laptop, which can only record microphone sound, This audio recorder allows you to record internal audio, external audio, or both simultaneously on your laptop. Additionally, you have the flexibility to customize the audio format and quality according to your preferences.
Furthermore, it’s worth mentioning that SurFlex Screen Recorder also functions as a screen recorder. If you need to screen record on your laptop with audio, this app can still be used to capture your desired content.
To record audio on laptop:
Step 1. Launch SurFlex Screen Recorder on your laptop and then choose the Record Audio mode.

Step 2. Click Settings and then customize the audio output options.
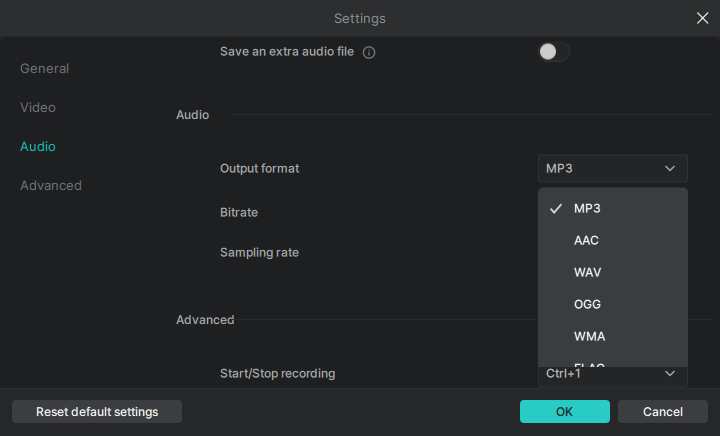
Step 3. To record voice on your laptop, select Microphone among the options. When you are ready to record, click REC.
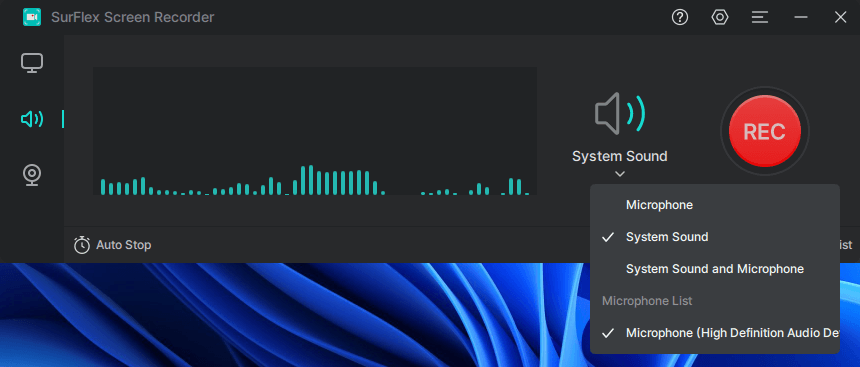
Step 4. When needed, click the Stop button to end the audio recording and check the audio in the recording list.

How to Record Your Voice on Laptop for Free
Tool: Audacity
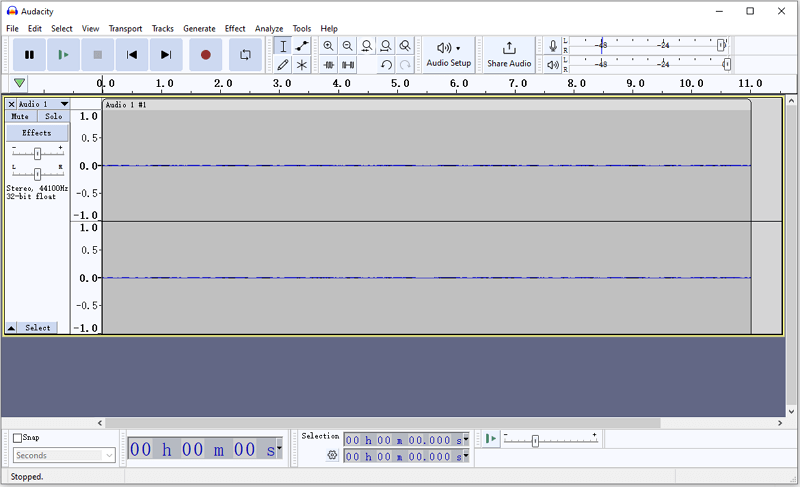
Using Audacity is the optimal choice if you want to record and edit the voice recording on your laptop. As an open-source audio recorder and editor, Audacity enables you to record system sound or microphone audio on your computer for free and edit audio tracks with ease. If you are going to record voice on laptop in MP3, WAV, or OGG format, don’t hesitate to give it a try.
To record your voice on laptop for free:
Step 1. Download and install Audacity on your laptop.
Step 2. Open the app and go to Audio Setup.
Step 3. Choose Host and select Windows WASAPI. Then go to Recording Device and select your microphone.
Step 4. Click the red Record button to start recording your voice.
Step 5. Once the recording is completed, click Stop.
Step 6. Edit the audio according to your needs.
Step 7. Go to File > Export to save the audio file to your laptop.
Wrapping Up
The best approach for you may vary depending on the type of audio you want to capture. If you only need to record microphone audio occasionally, using the built-in voice recorder on your computer is the most convenient choice. However, if you not only need to capture your voice but also want to record other types of audio from your computer or perform screen recording with audio, using a third-party screen recorder like SurFlex Screen Recorder is recommended.
About the Author
Related Articles
-
How to Record External Audio on Android in 3 Ways
If you are wondering how to record external audio on Android, read this guide and you will know the easy tips to get it done.
Myra Xian Updated on -
How to Record Internal Audio on Windows 11 in Every Way
You will know how to record internal audio on indows 11 to record what you hear from your PC or laptop with various tools.
Myra Xian Updated on -
How to Record Internal Audio on Windows 10 | 4 Proven Ways
If you want to know how to record internal audio on Windows 10, check this guide and you will get the easy answer.
Myra Xian Updated on

